

Every time you depend on the generator for just one thing, a generator start problem can throw your whole plans off or even endanger your safety. Now that you are using it only for household equipment and power backup during an outage, an unstartable generator is a serious problem you need to address right away. This article is a comprehensive, all-inclusive tooling tip that puts you in a position to get your generator running. And we will provide you with a run-through check at all stages, point out the most common causes, and give you tips you can use to get your equipment running efficiently. As soon as you finish reading, the situation will be such that you will be able to tackle the problem with the least period and strain, by holding the correct knowledge of what to do.
Understanding Your Generator

The correct stance that you need to assume if you want to be an effective troubleshooter and caretaker of the generator is that you must be conversant with the very basics of the generator and the major parts that serve specific functions. The principal sections that are crucial are as follows:
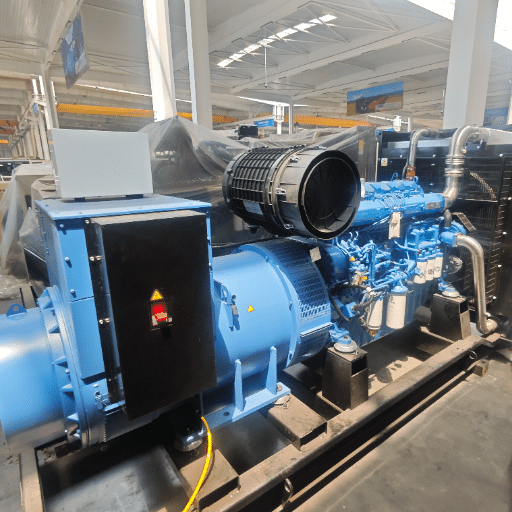
Engine
The engine is the powerhouse behind the generator and is the most common fuel: gasoline, diesel, or propane. Maintaining the same level of efficiency through regular oil check and filter cleaning is the surest way.
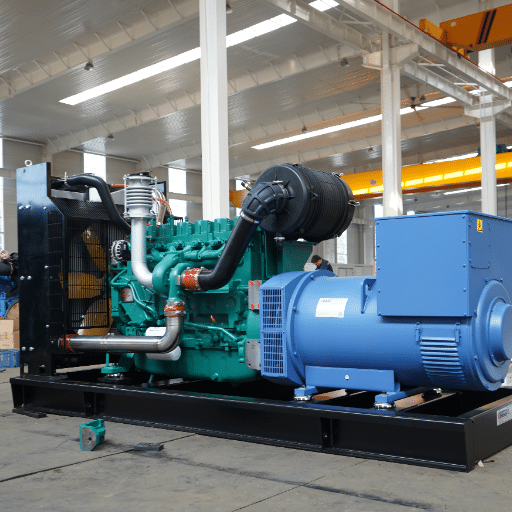
Alternator
The alternator converts the engine’s mechanical power into electricity. Any problems with the alternator can lead to insufficient or no power output.
Fuel System
The fuel system’s job is to carry fuel to the engine. Filter blockage, air in the fuel line, or low fuel are the most common problems.
Battery
While the generator depends on the battery for starting, the battery should be charged and clean of any corrosion.
Control Panel
The electrical panel is the generator manager that monitors voltage, frequency, and engine speed. Panels that are not working can be the cause of errors in the readouts and/or the wrong function.
Knowing these components well not only helps with troubleshooting but also ensures safety measures are in place to prevent operational problems.
Types of Generators: Portable vs. Stationary
Common Reasons a Generator Will Not Start
Dead or Faulty Battery
Generator starting problem due to a quite frequent issue: the battery dying or not working correctly. As a result of improper charging, terminals corroding, or batteries ageing, the power required for start-up is sometimes insufficient. Running necessary voltage and condition inspection tests on the battery at a specific frequency will help to control this problem.
Fuel Supply Problems
No fuel or low-quality fuel usually accounts for most starting failures. Water in the fuel, fuel that has been there for a long time, tampered-with fuel, or blocked fuel lines can prevent combustion. Making sure a generous supply of good fuel is available and that the filter system is replaced routinely will reduce the number of these issues day after day.
Blocked Air Filters
A dirty or clogged air filter is preventing the necessary airflow to the engine. The filter can only be from dirt that might have gotten in during the engine’s operation; if it’s clogged, it won’t be able to fulfill its task. This process requires regular maintenance, including cleaning or replacing the air filter as recommended by the manufacturer.
Insufficient Oil Levels or Oil Quality Issues
The majority of generators come with a low-oil sensor feature built in. The purpose of this feature is to stop the generator from running when the engine oil reaches a level at which it would run in a damaged condition. At the same time, using the wrong oil or oil that has been running for a long time can weaken engine parts, leading to starting problems. The other essential thing is to do oil checks on time, with oil changes scheduled as per the maker’s guidelines.
Faulty Spark Plug
A damaged or aged spark plug causes startup issues for the generator because it fails to ignite uniformly. This results in the generator failing to start due to a lack of ignition. Thus, verify spark plugs regularly and look for corrosion, cracks, or excessive carbon buildup. Not to mention, if any of these signs are strong, it’s high time you started for reliable ignition.
Electrical Component Failures
The generator may not start due to an interruption in electrical continuity; one reason could be that the control panel, relays, or fuses are not working correctly. Regular electrical diagnostics can help detect problems before they worsen, enabling early repairs.
Importance of Regular Maintenance
To prolong the generator’s operational life and achieve the best possible performance under demanding conditions, regular maintenance is essential. With servicing a very critical part of any heavy equipment maintenance program, a failure that could have been prevented would not only cost you money but also put a strain on the system, thereby reducing its life. The other argument and the real reason for the inspection of the systems is that the operators would also be able to find the damages caused by wear and tear and thus repair work could be confined to a small area, therefore saving time and money. Furthermore, by following the manufacturer-recommended inspection intervals and taking advantage of diagnostic tool improvements, operators can achieve higher reliability, steadier operation, and greater overall system efficiency more quickly.
Initial Diagnosis Steps

Visual Inspection
Check the system for any noticeable damage, loose connections, or leaks. Especially ensure the hoses, seals, and fittings prone to wear are given much attention.
Check for Error Codes
Use the onboard diagnostic tools or external diagnostic equipment in tandem with your generator to find the stored error codes. Use these codes to identify system failures, errors, and potential causes.
Verify Fluid Levels
Make sure all fluid levels, including diesel, engine oil, and coolant, are within the recommended range. Low-quality or contaminated fluids can drag down your system’s efficiency much more quickly than you might imagine.
Assess System Performance
One simple test, such as starting the engine or turning the system on, should be performed to verify functionality and note any unusual noise, shaking, or delayed response.
Review Maintenance Records
To solve performance issues, one might use the current maintenance logs to identify the recurring problems or operations disrupted by incomplete tasks that are supposed to be completed at certain times.
Checking the Fuel Tank: Got Gas?
One of the main points to consider when fueling the system is to check the diesel level in the tank and remove any dirt particles. The first thing to do is visually inspect the tank to confirm the fuel level; then, if needed, you may want to consider raising the fuel tank level. Particles, micro-organisms, or chemicals are among the top culprits that can cause severe damage when fuel quality is poor, and other system components cannot be filtered easily and need more frequent replacement or cleaning as a result. Proactive quality testing of the fuel is also among the main steps one might take to avoid the above trouble, as leakage, etc., might still occur even with only the microorganisms present in the tank. One problem the investigation must also address is whether the organisms are in the fuel they use for the engine, which might have sharpened memories of engines stopping because they grew in the jet fuel being delivered to the tanks.
Inspecting the Oil Level
Accurately analysing oil levels is essential for a properly functioning engine and to avoid early wear and system failure. First of all, the car or machine should be placed correctly on a flat, steady surface, because if it is on a slope, the measurement can be incorrect. If the engine was switched off not long ago, give it time to cool, as hot oil can cause mistakes and lead to dangerous situations. The stick is easy to find because it has a very shiny, bright-colored, or white handle. Take it out with care, and clean the stick with a piece of fabric or a paper towel that doesn’t shed lint. Moreover, insert it back and push it as far as it can go into its housing.
Upon removing the dipstick, watch the oil level next to the indicators marked “FULL” and “LOW.” Your car’s oil should be at the level of the green dot on the dipstick—if it’s below, add the type of oil specified by the vehicle’s manufacturer. You must not forget to inspect the color and viscosity of the oil; if it is very dark, opaque, or contains particles, this should point to contamination or to the oil starting to degrade, which necessitates an oil change. To protect the environment, proper disposal of used oil and all oil change- and lubricant-related materials is required, as mandated by law. Regularly and methodically conducting this inspection will ultimately reveal the engine’s health, and the equipment’s lifespan will also be extended.
Evaluating the Choke and Fuel Valve Settings
It is essential to evaluate the choke and fuel valve settings and adjust them correctly to achieve optimal engine performance. The choke, which is the central part in regulating the air-to-fuel ratio during engine starting, should be fully engaged (closed) in cold-start conditions to enrich the mixture. Then, after the engine reaches the right temperature, the choke has to be gradually disengaged (opened) to let the airflow work properly. If the choke is not set correctly, it can cause the car to shake, stall, and use more gas.
In the same way, the fuel valve must be checked to see if it’s working and positioned correctly, as it controls the gasoline flow to the carburetor. Keep the valve in full-open mode when working with it, and when not in use, keep it closed to prevent fuel leaks and vaporization. Regular maintenance, such as inspecting the fuel valve for air blockages or plant debris, will keep the engine performing at its maximum and prevent disruptions. Accurately assessing these parts improves fuel efficiency, reduces wear on engine components, and allows the engine to run without a hitch even in various environmental conditions.
Common Troubleshooting Issues
Check Fuel Supply
Make sure the gas tank is full and the fuel valve is fully open. As for the fuel, it must not be old or contaminated; substitute with no fuel if needed.
Inspect the Spark Plug
Take out the spark plug and check to see if it is dirty, worn out or corroded. If the spark plug is visibly damaged, worn, or messy, clean or replace it.
Air Filter Blockage
An engine can get little or no air if the air filter is clogged. The problem can be solved by removing the air filter and cleaning it thoroughly, or by replacing it if cleaning the filter does not seem to help.
Carburetor Issues
Inspect the carburetor for clogging or residue accumulation. If the issue persists, clean it with the correct cleaner, or bring it to professionals to have them solve the problem.
Checking the Spark Plug
The spark plug serves a crucial function in the ignition system, providing the electrical spark that ignites the air-fuel mixture in the engine’s combustion chamber. To inspect the spark plug, it is recommended to start by gently removing it with the correct socket and wrench, taking care not to damage it. The electrode and ceramic insulator need to be carefully examined for wear, such as erosion, cracking, or discoloration. A light tan or grayish color indicates normal wear, while black soot may indicate a too-rich fuel mixture, and a white or blistered appearance may suggest overheating or lean operation. Moreover, you need to manually measure the gap between the center and ground electrodes with a feeler gauge and compare it to the manufacturer’s specs to ensure it is within a suitable range. Not setting the gap appropriately may lead to engine misfires, reduced fuel mileage, and reduced engine power.
Cleaning the Air Filter
An air filter is significant in keeping an engine running efficiently because it blocks dust, dirt, and other particles that could otherwise enter the combustion chamber. The very first step to properly clean an air filter is to check the vehicle’s instruction manual to find the air filter housing location, since its design and location may differ by model. After that, when you get both the area and the air filter out, examine them to see if they are clean, damaged, or showing signs of excessive wear. If the filter is made of materials that can be reused, such as foam or fabric, use the air compressor to gently blow out the debris, or wash it with a mild detergent and let it dry completely before putting it back in. If the filters are made of paper, they are not reusable and should be replaced once they become clogged or used up. Having the air filter cleaned and working at peak performance leads to air intake efficiency, improvement in fuel combustion, and reduced harmful emissions, thus a better vehicle performance and in addition, the longer life of the engine is achieved.
Inspecting the Carburetor: Is It Clogged?
The carburetor is an essential part of the engine’s operation, as it mixes air and fuel in the correct ratio for optimal combustion. As time goes by, the carburetor can become covered with dirt, varnish, and fuel residue, which can cause it to clog and disrupt the mixture balance. The first step in detecting a clogged carburetor is in your hands, so you are advised to carry out a visual check of the carburetor’s components, which are the jets, the float bowl, and the throttle plates, and see if there is any dirt or any kind of obstacles on them. When you notice something different, like a lack of smooth, sticky movement or a coating of residues, you should get alerted. If the engine becomes more stubborn to start, starts but won’t run smoothly, or gas mileage is reduced, these might be evidence of a carburetor clog. To clean, the unit needs to be taken apart according to the manufacturer’s guidelines and a carburetor cleaner with a specialized formula should be used to dissolve dirt and residue. If you still have clogging problems after a thorough cleaning, the parts most prone to damage over time, such as jets or gaskets, may be part of the problem. Prevent significant wear by properly taking care of the carburetor and at the same time, its life will exceed expectations when parts are regularly checked and cleaned.
Advanced Troubleshooting Techniques

It is a fairly common occurrence for carburetor systems to experience an imbalance in the air-fuel mixture, which ultimately causes the engine to operate poorly. To correct this, first check that the air-to-fuel ratio adjustment screws on the carburetor are correctly set, as these screws have that function. Look up the manufacturer’s guidelines and use those to make accurate adjustments to the screws.
If the modifications do not fix the problem, start looking for vacuum leaks around the intake manifold or at the bottom of the carburetor, as such leaks might cause a change in the mixture. A spray bottle filled with soapy water or carb cleaner can be used to find leaks—the appearance of bubbles or changes in the engine’s behaviour can indicate potential leakage areas.
To finish off, take a good look at the air filter and see if it is too dirty to cause a blockage, thereby leading to an imbalance. Before throwing the filter away, go over the conditions necessary for proper operation of the engine, after which you can affirm the resolution of the problem. The three examinations together indicate that the tuning is correct and the carburetor’s operation is perfectly optimized.
Testing the Recoil Starter
Before you proceed further, would you please check the starter cord of the recoil starter for any physical damage, such as fraying, tearing, or loss of elasticity? Indeed, a rupture in the cord would ultimately result in the starter failing. Then, gently pull the starter cord. Permit it to spring back, and observe whether it does so smoothly and without any hitches—resistance during retraction might indicate a failure of the recoil spring mechanism.
Let’s open up the frame so we can check the recoil system and detect any noticeable deformities, corrosion, or misalignments in the spring, pulley, and rope assembly that could lead to misoperation. Apply a light oil to the motion parts designated for lubrication to make the operation smoother and reduce friction. On top of that, a way to check if the starter engages properly is to pull the starter cord once with moderate force. At this stage, the pawls should be displayed in the flywheel. If the system gives way after one or multiple starter cord pulls, or if it just doesn’t engage at all, it’s time to take a closer look at the pawls and flywheel parts, and maybe clean and/or replace them. Once everything is put back together, there should be no trace of a problem, the entire system should be working nicely again, and the final tests will show that the job has been done. Such detailed inspections and repeated tests confirm that the recoil starter is operating at full capacity.
Examining the Valves for Proper Operation
Upon suspending preoperative screening, the initial step is to remove the valve cover to access the valve assembly. Go over the parts meticulously to check for any signs of wear, corrosion, or damage, such as cracks or excessive carbon buildup, that could impede performance or, conversely, reduce efficiency. For the next step, use one of the several feeler gauges to measure the valve clearance, keeping in mind that it must be within the factory-preferred range. A deviation from the norm could indicate severe issues, such as valve seat wear or improper adjustment, which could lead to compression loss or even valve destruction over time.
Examine the valve springs for uniform tension and verify that there are no signs of damage or deformation, as these could completely mess up the timing and precise function of the engine. Leaking of both intake and exhaust valve seals may be indicated by a leak-down test, which should be considered during more detailed troubleshooting. Hence, in addition to that, this test will give you indispensable information about whether the valves are properly closing, as well as, very significantly, the opportunity to identify any leaks in the system. Finish cleaning any residue and/or accumulated material from the valves, then put all the parts back according to the procedure. Details paid to will not only allow the valves to function properly but will also ensure the engine runs amazingly and lasts longer.
Safety Precautions When Troubleshooting

⚠️ Critical Safety Guidelines ⚠️
- Disconnect Power Sources
The power supplies of all types, be it electrical, battery, or fuel, indeed, should be completely shut off to avoid any accidental activation of the units. - Wear Proper Personal Protective Equipment (PPE)
Safety precautions include the use of gloves, safety glasses, and protective footwear to safeguard against injuries from sharp objects, high temperatures, or chemicals. - Ensure Proper Ventilation
Ensure Your Area is Well-ventilated – Activities involving environments with poor air quality require you to ensure that fumes are carried outside and do not recirculate or spread in the room. - Use Proper Tools
Make sure that the tools are the right ones for the job. This will help you avoid both injuries to yourself and damage to the units caused by using a tool that is not meant for the job. - Follow Manufacturer Guidelines
It is good practice to use the manufacturer’s guidelines and specifications to handle systems and components accurately and safely. - Verify System Stabilization
Before you carry out any diagnostic or repair work, make sure that the systems are completely shut down and touch-safe.
Ensuring Proper Ventilation
The following are the reasons for the need to ventilate well: to maintain air quality, regulate environmental conditions, and ensure people’s safety in confined spaces. Thus, the accumulation of hazardous gases such as carbon monoxide or volatile organic compounds is prevented by allowing air to move freely, thereby limiting exposure to these dangerous gases. Modern ventilation methods are adopting high-efficiency particulate air (HEPA) filters and energy-efficient mechanical exhaust systems, which are considered effective in controlling air pollutants. Through ventilation systems, a minimum air supply of 20 cubic feet per minute (cfm) per person is achieved, and if this is done, the building will be, which significantly improves respiratory health and cognitive performance among those working in closed spaces. Require ventilation systems to comply with ASHRAE guidelines and to remain functioning optimally, with reduced downtime through regular maintenance.
Using Protective Gear
In areas where the presence of physical, chemical, or biological hazards is a given, the importance of using proper personal protective equipment (PPE) can’t be overstated. The main point in selecting PPE is a comprehensive risk evaluation that takes into account particulars, such as the type and degree of the hazard, the duration of the worker’s exposure to the hazard, and the specific tasks. The chemical industry considers nitrile or neoprene gloves for chemical resistance, goggles with indirect ventilation for splash protection, and respirators that meet NIOSH standards for filtration efficacy and are correctly fitted as standard gear.
The most recent information confirms that workplace problem-solving using PPE is a significant factor in reducing work-related injuries and illnesses. To provide the highest level of protection, the PPE must be kept in good working order, regularly checked for damage, and replaced in accordance with the manufacturer’s recommendations. On the other hand, only when employees are adequately trained can they benefit from and use protective gear effectively, while also operating safely and complying with OSHA regulations. Also, by adopting and using innovations such as helmet sensors and other devices, a more innovative, safer working environment can be achieved even in the most dangerous situations.
Disconnecting Power Sources
It’s a basic safety practice to always first properly disconnect power sources when performing a task on or near a power-driven apparatus. It is vital to disconnect and block all power supplies connected to the equipment before performing any maintenance or repairs, to prevent the equipment from being accidentally powered on. Shutting off equipment, locking out circuit breakers, and affixing warning labels to inform others about the work being done are common steps companies take to achieve this end. In accordance with NFPA 70E standards, workers must double-check that there is no voltage present using proper testing equipment. In addition, wearing gloves and using work tools rated for the voltage are excellent options for protecting against unexpected electrical contact with conductors. These rules help companies take big leaps toward greater safety by avoiding electrical accidents, arc-flash incidents, and equipment damage.
Reference Sources
Optimizing the generator start-up sequence after a power blackout
Summary: This study focuses on optimizing the sequence of starting generators during power system restoration after a blackout. It outlines a three-phase process: generator start-up, network re-energization, and load restoration.
The importance of using the high voltage pulse generator in starting processes
Summary: This paper discusses the role of high-voltage pulse generators in preventing risks like explosions during generator start-up. It highlights the use of air flow sensors and pre-start timers to monitor and ensure safe operations.
Frequently Asked Questions (FAQs)
What to do if my generator won’t start?
When your generator fails to start, specific steps must be taken to solve the problem. To begin with, just examine the fuel level to find out if the darkness of the fluid doesn’t indicate the use of stale gasoline, and that would, in turn, cause difficulty in starting up, so, possibly, drain the fuel tank and refill it with new gas. Further, determine the choke’s position; moving it can help the engine if it has no power to kick-start. Besides, confirm the oil level is correct and that the spark plug shows no wear or damage. However, nothing appears wrong, so the starter motor and other parts may warrant further examination for potential problems.
How can I troubleshoot a gasoline generator that won’t start?
Reasons a petrol generator fails to start can vary. The first step when facing this issue is to check the fuel valve and ensure it is not closed and that the fuel line is not clogged. Later on, if the fuel is fresh but the engine still refuses to start, the following are possible steps one can take: first, check the spark plug wires and even remove them to test whether they are fouled. If the spark plug is wet with oil or appears damaged, it may need to be replaced. Furthermore, keep an eye on the carburetor; if it is dirty, cleaning it could revive the machine. By following the said methods of diagnosis, your generator may yet be saved and begin once more.
What should I check if my portable generator won’t start?
First, ensure your portable generator has enough fuel if it won’t start. Make sure the gas in the fuel tank is fresh, as the starting problem is likely caused by stale gasoline. Also, check the choke position; you might improve the starting efficiency by adjusting it. Don’t forget to remove the spark plug and inspect it for cracks or deposits from excessive carbon buildup. If the spark plug is still in good shape, it might be the oil level, as the generator can’t start due to a lack of oil. The last thing is to make sure that no connection in the system is loose and that there is no clogging in the fuel system.
Why is my generator’s starter motor not working?
When the starter engine of your generator is not functioning, there are a couple of reasons. Initially, one should check whether the battery is fully charged and whether the connections are secure and free of corrosion. Another reason the generator may not start is a defective starter motor, which, in such cases, requires replacement. Moreover, the recoil starter mechanism needs to be checked to ensure it is functioning as intended. Occasionally, the problem you’re facing might be in the ignition system. In addition, check whether the spark plug and ignition coil are working correctly. The final result of this kind of troubleshooting is that you will be able to find and fix the problem.