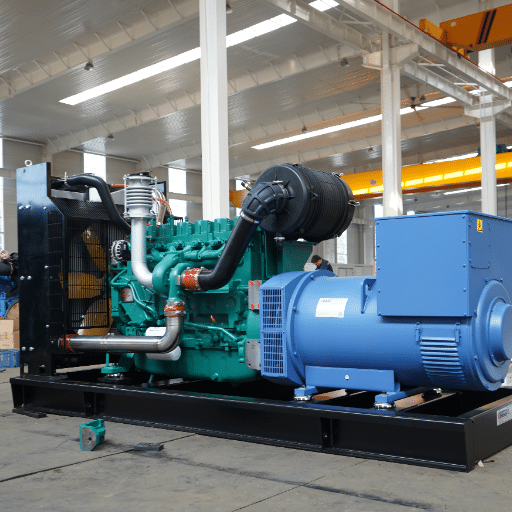

It can be unpleasant when your generator won’t start, especially when you are expecting it to provide backup power during a blackout or to handle the power supply for your project. Generators are incredibly complex machines and, though they are designed to be reliable, a variety of factors can cause start-up problems. From mechanical faults to fuel system irregularities, identifying the exact cause of the problem may be difficult without the requisite expertise. In this article, you will be taken through the most prevalent reasons for a generator’s failure to start, thereby leading you in the right direction and, in many cases, allowing you to fix the issue on your own. Home users with a portable generator and owners of bigger industrial units will both benefit from this information; thus, it will also be to their advantage time-wise, and, one may say, even money-wise.
Understanding Generator Issues

Fuel System Issues
One of the most common causes of a generator not starting is a lack of or contaminated fuel. To resolve the issue, the fuel tank should be filled correctly, and the fuel, water, or debris should be checked. With fuel that is old, replacing it with fresh fuel will often solve the problem.
Battery Problems
One more big problem is a weak or dead battery. The battery’s charge should be checked and its connections. Also, if all the terminals are corroded, power won’t be delivered properly. So, clean them out if necessary. If the battery is discharged completely, it may only be recharged or replaced.
Clogged Air Filter
A clogged air filter can be another reason the engine isn’t getting enough air, reducing the effectiveness of the combustion process. You can check whether the air filter is dirty or clogged, and if so, either clean it or replace it.
Spark Plug Failure
A spark plug that is either dysfunctional or clogged could interfere with the ignition. The spark plug should be in top condition and critically evaluated to ensure it is clean and properly gapped. If necessary, replace it.
Oil Levels and Sensors
Most power generators are equipped with oil sensors that shut down the engine if the oil level is too low. The oil level should be checked, and the oil replenished or replaced with the correct grade if necessary.
Overview of Common Generator Problems
| Problem | Cause | Effect | Solution |
|---|---|---|---|
| Failure to Start | Battery issues | The generator won’t operate | Recharge or replace the battery |
| Spark Plug Failure | Worn or fouled spark plug | Disrupted ignition | Clean or replace the spark plug |
| Low Oil Levels | Insufficient engine oil | Automatic shutoff activation | Refill with the correct oil type |
| Dirty Air Filter | Accumulation of dust/debris | Reduced engine efficiency | Clean or replace the air filter |
| Fuel System Blockage | Clogged fuel lines or filters | Engine stalling | Clear blockages and replace fuel |
| Electrical Malfunction | Faulty wiring or connections | Power output issues | Inspect and repair wiring |
| Overheating | Poor ventilation or coolant loss | Engine shutdown | Ensure proper cooling airflow |
| Generator Overload | Exceeding maximum load capacity | Unit damage | Reduce load to safe limits |
| Control Panel Failure | Damaged control module or fuses | No monitoring functionality | Repair or replace components |
| Exhaust System Issues | Blocked or damaged exhaust | Increased emissions/noise | Unblock or repair the exhaust |
| Stale Fuel | Old or degraded fuel | Difficulty starting | Drain and refill fresh fuel |
Importance of Regular Maintenance
Routine checks and procedures play a key role in maintaining the long-term reliability, efficiency, and safety of equipment. An industry study found that 20-30% of operational efficiency is lost due to bypassed maintenance, and defects in this regard may lead to unexpected failures. Taking generators as an example, regular checks and maintenances ensure that the fuel system, air filters, and electrical connections are clean and in good working order, which means no downtime, no loss in profits, and, at the same time, a longer unit life.
Moreover, implementing a planned servicing program will slash the environmental footprint by keeping released pollutants and sound within defined margins. Lubrication, calibration, and spare part changes, among others, will cut energy consumption by 15%. This will cut down the cost. And the combination of traditional and predictive maintenance techniques, including IoT sensors and advanced diagnostics, will result in better, on-time problem recognition, leading to no critical failures.
How to Identify Starting Issues
The process of uncovering the root causes of mechanical systems or engine malfunctions always starts with a very methodical examination of primary parts and operational variables, step by step. One of the most critical elements is the engine running weirdly at startup – e.g., the igniter glows, but the main burner doesn’t fire up, or uneven combustion takes place. The very first step is the battery, since no power may reach the system due to a bad connection through corroded terminals or too little voltage. To be sure the battery isn’t the issue, hook up a multimeter to it and monitor the voltage; it should be at the level recommended by the manufacturer.
Scrutinize the starter motor to make sure it is not damaged. The aging parts in it might cause inefficiencies. The electrical connections between the ignition key, solenoid, and starter relay need to be traced for continuity to make sure the voltage is transmitted correctly. Using techniques like thermal imaging, overheating in circuits can be detected, which is an indicator of resistance or malfunctioning parts. In the ignition systems, the fuel delivery system, like the pump, the injectors, and the filters, should be given special attention, as they can be the cause of ignition problems, one way or another.
Common Reasons Your Generator Won’t Start

Lack of Fuel
You need to inspect the fuel tank first to see if it contains an adequate amount of fuel. Also, fuel that has become stale or contaminated may prevent the generator from starting; in such a case, let the tank empty and refill it with fresh fuel.
Battery Issues
A dead or weak battery is very often the reason. Check the battery’s charge and connections. If necessary, tighten all loose terminals, then charge or replace the battery.
Clogged Air Filter
A dirty air filter blocks airflow, which is a significant factor in the generator not starting. Clean the old air filter or install a new one to fix this issue.
Spark Plug Problems
Bad or old spark plugs can cause problems with ignition. Take it out and give it a quick look to see if there is any corrosion or damage. If you see it’s required, replace it and make sure the gap is set correctly.
Oil Level Sensor
A lot of the generators today have a low oil sensor, which, if oil is too little, does not let the engine start. Check the oil; if it’s low, add more.
Fuel Issues: Contamination and Levels
A malfunctioning generator due to fuel contamination and improper fuel level is the most common scenario. Water, dirt, or low-quality fuel are examples of contaminants that can cause the engine to perform poorly, making it very hard to start or operate unevenly. Water is a case we should be especially concerned about, as it may cause the combustion process to stop and lead to corrosion in the fuel system. One way to prevent it from contaminating the fuel and maintaining its clarity and cleanliness is to use a fuel stabilizer. Be sure to keep the tank filled with an appropriate amount of fuel, avoiding both overfilling and running low. In addition, running a generator with a small amount of fuel may create gaps in the system, leading to stalling or permanent damage to components such as fuel lines and pumps. The schedule for fuel line inspection and cleaning is to be followed to ensure continued efficiency and operational certainty, among other things.
Battery Failures: Signs and Solutions
A failing generator battery often shows critical symptoms, such as problems with the generator’s start-up, very weak light or blinking lights, or a sudden reduction in voltage output. The causes of such issues can include sulfation, long periods of non-use, or improper charging procedures. Sulfation is one of the common causes of sulfate crystals forming and growing on the battery plates, ultimately reducing both performance and charging capacity. One of the main reasons for this is improper use of the battery, which can cause these symptoms to appear early, even when the battery is still new. Regular testing of the battery with a multimeter or load tester is a must to detect and note any changes the battery is already undergoing, which can prevent a lot of inconvenience and, sometimes, more cost in the future.
Guard against short circuits that may trigger battery failures by ensuring proper timing for battery watering. This primarily involves washing terminals to prevent rust, checking electrolyte levels in vented batteries, and using a manufacturer’s recommended charger for recharging, which will, in the end, avoid overcharging or undercharging. To achieve the best performance, replacing the elderly batteries every 3-5 years is a good idea, as their power output naturally decreases over time. Monitoring environmental changes is another very important factor, as very high or very low ambient temperatures can significantly shorten the battery’s lifespan. The use of modern solutions like AGM (Absorbent Glass Mat) or lithium-ion batteries can reduce sulfation buildup and are not affected by large temperature swings, further increasing reliability and prolonging operational life.
Clogged Air Filters: Impact on Performance
Air filters that have accumulated dirt not only hinder the system’s performance but also pose a serious threat in various areas, with automotive engines and HVAC being the most significant sectors. There is less airflow when dirt, dust, and other particles clog the air filter, so mechanical strain increases. An obstructed air filter in the vehicle’s engine can reduce mileage by up to 10% and cause a loss of horsepower, which is easily detected because there is not enough airflow to mix with the fuel during combustion. In the same manner, in AC systems, low outdoor airflow makes the system work harder, consuming more energy while simultaneously diminishing cooling or heating performance. Experts agree that proactively changing or cleaning air filters can improve performance by 5% to 15%, depending on the system’s design and use. Beyond that, obstructed filters can cost you more than just performance; they can damage system components, cause overheating, or compromise indoor air quality and trigger allergies. The most effective way to enhance efficiency and prolong the system’s life is through a regular program of air filter inspection and replacement.
Electrical Problems

Whenever an electric system malfunctions, it is usually due to broken wires, an overloaded circuit, or components not functioning properly. To solve these problems:
Faulty Wiring: Check every connection and look for any signs of damage, corrosion, or improper installation. Do not delay replacing damaged items to avoid potential dangers, such as electrical shocks or fires.
Circuit Overloads: Apart from checking the overloaded circuits due to the excessive power demand, also spread electrical loads more evenly or if necessary enhance the circuit capacity.
Malfunctioning Components: Find and replace all the faulty components, e.g. switches, outlets or breakers, to get rid of spoilage and maintain the safety of the area in operation.
Following safety measures and seeking assistance from licensed technicians whenever necessary is the core principle for solving electrical problems safely and with the least risk.
Wiring Issues and Connections
It turned out that the most significant reasons for poor wiring and substandard connections that lead to electrical failure and a fire hazard in both residential and commercial settings are the same. One among them is the first to provide electricity to the world, and human error is the second. These are the world’s most common issues, and a couple of others are wires of the wrong size, and/or insulation cut or disintegrated. For example, loose connections may cause arcing and generate an enormous amount of heat, which, in turn, may significantly compromise the electrical system’s integrity. The wires are more likely to short-circuit when the insulation is damaged or absent, and cables are also more likely to cause accidental touch-alarming. Moreover, if the wire sizing is too wrong or too large for the current it carries, it can produce too much heat and eventually burn the circuit.
The use of standardized wiring methods that are properly color-coded and made of high-quality materials is a fundamental and crucial aspect of modern practice. On the same note, copper conductors are the first choice primarily because of their excellent conductivity and resistance to corrosion. One of the best aids in the electrical connection unreliability issue is the proper termination method and this includes the use of the appropriate connectors and the application of the right crimp tools.
In the United States, electrical codes like the National Electrical Code (NEC), if followed, can help avoid the above problems because they provide guidelines for wire type, gauge, and connection practices. In addition, another way to prevent significant system failures is to regularly conduct inspections and perform continuity tests, resistance checks, and thermal imaging.
Starter Motor Functionality
The starter motor is an essential element of the internal combustion engine and is responsible for initiating the crankshaft’s rotation, the basic task of starting the engine. This is all possible with the help of some parts working together, the primary ones being the solenoid, the armature, and the pinion gear. Once the ignition key is turned, the starter motor solenoid is activated, completing the electrical circuit and allowing the high current from the battery to flow to the motor. And then, the pinion gear and the flywheel or flexplate connected to the crankshaft are engaged in running at the same time.
After the starter was powered up, the motor’s armature, the flywheel, and the engine cylinders had already commenced the combustion cycle. Various improvements in starter motor technology, such as gear-reduction designs and integrated voltage regulators, have indeed led to greater power savings and enhanced system durability. Another type of starter, a high-performance permanent magnet starter, has also been attached to the system, offering more power and lower power consumption. On top of that, a maintenance schedule that includes checking connections, solenoids, and motor brushes up to the starter motor system’s maximum life expectancy and uninterrupted functionality is the regular one.
Troubleshooting Your Generator

1. Check Fuel Levels and Quality
Make sure the generator has enough fuel and that the fuel is not stale or contaminated. Old fuel can cause inefficient operation or prevent the generator from starting.
2. Inspect the Battery
Check whether the generator’s battery is holding the correct charge. A totally outdated or non-working battery is one of the main reasons for the startup issue. Remove any corrosion from the terminals to ensure a proper connection.
3. Examine the Air Filter
A dirty air filter blocks airflow, causing the engine to fail or run poorly. Change the air filter with a new one if needed, or else clean the existing one.
4. Verify Oil Levels
Low oil level or poor-quality oil can trigger the generator’s safety features, resulting in a shutdown. Check the oil level and quality and fill in or change it as required.
5. Inspect Spark Plugs
Drag off the spark plug and look for any wear or excessive carbon buildup. If it shows any wear, it may affect its ignition function, so you need to replace it to restore proper ignition.
6. Check Circuit Breakers and Connections
Thus, it is essential to switch all circuit breakers to the ‘on’ position and visually check for any wires that may be coming off or showing visible signs of damage. Fix or change the wiring if there is any damage.
Testing Fuel System and Battery
The evaluation of the fuel system and battery should be completed to maintain the generator’s performance at its best. One needs to manually check the compliance of fuel lines and fittings with the safety rules. It is a great thing that the examination you do will never be in vain, as insufficient fuel flow isn’t a problem when the generator is in operation. Besides, you will have a fresh tank of fuel, free of impurities. The work was greatly done.
To get started with the batteries, check the voltage with a multimeter, making sure it meets the manufacturer’s standards (usually 12.6 to 12.8 Volts for a lead-acid battery), and make sure the battery is fully charged. Moreover, check the terminals for corrosion, as electrical connections may not be as good as they need to be. If the terminals are dirty, use a wire brush and apply a bit of dielectric grease to prevent corrosion buildup. Afterward, perform a load test to check the battery’s full capacity. If the battery does not meet the required performance standards, replace it. This step-by-step process will not only make the entire system reliable and durable but also significantly increase the efficiency of both components.
Checking Electrical Connections
A cautious examination of connections is indeed a must to ensure the proper operation of the system and to prevent faults effectively. The initial step would be to visually inspect the entire wiring harnesses and connectors for signs of wear, splitting, or weakness. Of course, connectors in high-vibration regions require more of the observer’s attention during inspection, as their wire connections wear out quickly. The recommended next step is to use a multimeter to check the voltage across parts of the system connected and confirm whether it is continuous, with no significant drops that would indicate resistance. Loose connections should be fastened according to the manufacturer’s specifications. Moreover, if wiring is damaged, it should be repaired or replaced immediately to prevent safety hazards. Also, you should not fail to repair wires that are supposed to serve as grounds, even if they look the same and have poor connections, as this is not the desired result. With the measures mentioned earlier in place, you can be assured that your system will not only be of high quality but also free of any future problems.
Common Preventative Maintenance Tips

Inspect Components Regularly
Carry out regular physical examinations to check for any signs that the hardware, wire, connections, or fasteners are weakening due to rust, corrosion, etc. If any problem is identified, the failure that would have followed can be avoided, saving money.
Clean System Components
Remove dirt, dust, and other contaminants that may affect the smooth operation of the system. Follow the company’s instructions regarding the use of cleaning solutions and tools to avoid damaging fragile materials.
Check Electrical Connections
Check that all the connections are not only tight but also free of any corrosion. Be sure to strengthen the ones that are loose to maintain performance and prevent interruptions.
Test System Performance
The system should be checked from time to time using advanced diagnostic equipment to ensure it is operating efficiently. This way, all parts will operate within the desired range, and the parts that need adjustment can be identified.
Follow a Maintenance Schedule
You should maintain your generator according to the manufacturer’s instructions to avoid neglect-related issues by performing all tasks on a schedule. Being systematic reduces the risk of forgetting.
Proper Storage Techniques for Generators
Proper storage of generators is of utmost importance if we want to maintain their performance and extend their lifespans. One should first and foremost place the generator in a clean, dry, well-ventilated corner, sun- and moisture-proofed, or in an area free of any corrosive materials that may corrode its internal parts. The type of fuel left in the tank should be drained, and the tank should be treated with Heet Red or Heet Green, as it hardens and becomes sticky if left for long, which can cause jamming of the pipe and the carburetor. The battery could also be a source of discomfort if not disconnected and placed elsewhere; hence, charging it only as required could reveal any depletion before the storage period.
To avoid rust or corrosion, it is advised to use protected generator-wire covers. During storage, it is best to inspect hoses, seals, and connections, and replace any worn or damaged components. To prevent the generator’s moving parts from seizing and its internal components from drying out, run the generator for a short time at regular intervals during extended storage. Lastly, follow the manufacturer’s instructions for specific storage requirements, as contemporary generators may use superior materials and features that require particular care.
Regular Servicing Checklist
1
Engine Oil Inspection and Replacement
To be sure that the oil is in the right place, always check it with the dipstick regularly. The oil should be changed as per the manufacturer’s instructions at least every 50 to 100 hours to prevent engine damage and to avoid buildup of deposits, thereby maintaining a high level of efficacy. The best thing you can do is pick the oil you need from the high-quality options, either a synthetic or a conventional blend, which is specifically recommended for your generator type.
2
Air Filter Maintenance
After 25 hours of engine operation, or as specified in the manual, the air filter must be checked. When using foam filters, they must be washed in soapy water and left to dry completely before being reinstalled. For paper filters, replace them once dirt accumulation is visible, as blocked filters cause the engine to operate less efficiently and can damage the engine.
3
Spark Plug Assessment
It is a brilliant idea to detach and inspect the plug after every 100 hours of operation or annually. Do this to check for corrosion, carbon residue, and worn electrodes. Clean or replace the plug if the situation demands it, to ensure a good spark and complete fuel combustion. The gap between electrodes should be set to the manufacturer’s specifications for optimal operation.
4
Fuel System Check
Clean and inspect the tank and fuel lines regularly to prevent blockages from water, sediment, or stale fuel. Change fuel filters regularly, based on engine hours or visible dirt deposits. Make it a rule to use the highest-quality fuel to avoid the possibility of ethanol conversion, a problem largely attributed to petrol.
5
Battery Maintenance (if applicable)
When handling electric-start generators, the battery has to be checked for corrosion or connections that are loose. One has to make sure the terminals are cleaned and tightened simultaneously. Voltage also needs to be checked occasionally, and if it’s below the line, the battery needs to be recharged or replaced to avoid start-up issues.
6
Cooling System Review
Being in charge of a liquid-cooled generator means you always have to keep an eye on coolant levels and, when the coolant type is right, do the topping off once in a while. The cooling system should be completely drained and refilled at least every 2 years to maintain the engine’s cooling capacity and prevent overheating.
Reference Sources
- 10 Common Reasons Your Generator Won’t Start: This article outlines common issues such as low oil levels, empty fuel tanks, incorrect choke lever positions, clogged fuel valves, and carburetor problems.
- My Generator Won’t Start – Troubleshooting Guide: This guide focuses on specific troubleshooting steps, including checking the battery connection, ensuring the start switch is functional, and verifying the start solenoid.
Frequently Asked Questions (FAQs)
How to troubleshoot when the inverter generator won’t start?
A small inverter generator that will not start is often readily diagnosed using a stepwise troubleshooting approach, which includes checking the battery charger connection. If the generator is equipped with an electric start, that is one more possibility to consider. The first thing to do is to make sure the start button is not engaged and that all safety sensors are precise, then unload any additional weldings, and try starting up again only after setting the choke correctly. If you still fail to make the unit crank, check the crank and valve cover areas for damage, and ensure that the ignition coil and spark plug deliver a good spark. If the gas has been sitting for too long, drain it, replace it with fresh gasoline, and make sure the vacuum relief on the gas tank is not blocked so the fuel can reach the carburetor.
What to do if the generator won’t start after refueling?
One possibility is fuel contamination or stale gasoline mixing with fresh gasoline, clogging the carburetor jets from the underside. In case this is the problem and other good gasoline does not clear up the situation, you may still need to take the carburetor apart to clean out the jet and intake side of the fuel path by using carb cleaner, being aware that the hose going back from the intake side might need to be replaced. Make sure the valve control screws are set correctly so that fuel can flow, and that the fuel valve is not leaking or sticking. You can connect these items, as well as any possible blockage in the tank, to the spark plug, a failed spark plug wire, or the ignition coil using a spark tester, if one is available.
How to get your generator to start when it won’t crank or turn over?
First, if the generator will not crank, ensure the crank mechanism and battery (for electric start) are functional, and that the start button and connections are undamaged. For models with a recoil start, check the recoil assembly and ensure no objects hinder crank movement or valve operation; the most common cause of a fault is debris at the valve cover or in the crank area. Make sure the safety switches and sensors do not cause any issues — at first, for the ignition safety sensors, just unplug them; then, when working by the instructions, inspect the spark arrestor and the exhaust for dirt. Check if the oil is low and perform an oil-sensor inspection, as starting is prevented if the unit detects low oil, especially on generator models with oil shutoff switches.
How to handle starting problems after an outage for a standby generator?
To fix the mentioned problem, first examine the gasoline tank, open the fuel valve to ensure fuel flow, then check the vacuum relief and the airlock. After this, it is time to perform a comprehensive check of the ignition components, with the most critical being the spark plug, spark plug wire, and the ignition coil that powers it. In case of no spark, make use of a spark tester to diagnose the problem. Remove old gasoline and replace it with fresh gasoline, and clean the jet and carburetor. You may even have to disassemble the carburetor depending on the situation. Also, ensure that all start-up systems are working perfectly, including the sensors and buttons, and that the battery is charged if the generator is battery-operated.