

The failure of the generator to start can be a very real and time-consuming issue, especially when power is of high importance during a period. Whenever you really need your generator as your primary power source during a power cut or during a situation in remote areas where you depend on it for crucial tasks, you have to know the reason why it is not starting. In this work, we shall deal with the most frequent causes of generator misbehavior as well as a very detailed presentation of the possible issues that may arise, such as fuel problems, mechanical failure, and electrical faults, besides these. By the end of this tutorial, you will have a good understanding of the process of identifying and solving these problems, and you will be well prepared to get your generator running smoothly once again with confidence.
Understanding Generator Functionality

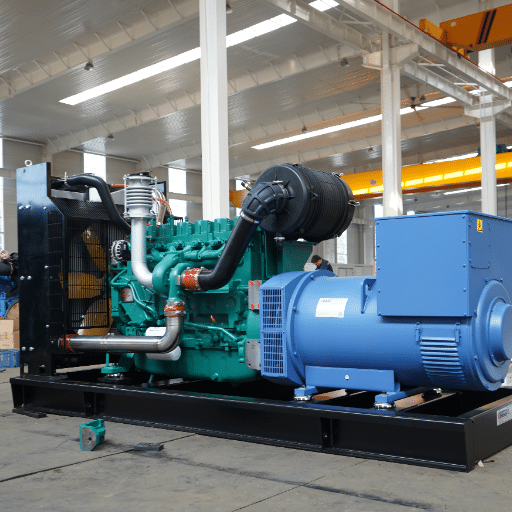
A generator works by converting mechanical energy into electricity via electromagnetic induction. This is a process that is only possible through the collaboration of three major components:
Engine – The engine is the piece of equipment that gives mechanical energy to the generator. Its effectiveness determines the generator’s capacity for electricity production, as the most significant engines produce the highest output.
Alternator – An alternator is a device that converts mechanical energy from an engine into electrical energy. The alternator has a conductor that moves in a magnetic field, generating electricity that is made usable.
Control Panel – The control panel manages the generator’s operation, including starting, stopping, and monitoring output metrics such as voltage and frequency.
Through proper interaction among these components, your generator operates with the required power and high reliability. Maintaining each part in good condition is key to the efficient operation of the entire equipment.
How Generators Work
Generators convert mechanical energy into electrical energy through electromagnetic induction. As the engine spins the alternator rotor, a magnetic field is generated, causing electric current to flow through the stator’s winding. As this electric current flows back and forth through the winding, the generator produces alternating current (AC), which is then filtered and regulated by its components before being sent to the systems or devices connected to it.
The output voltage of an advanced generator is stabilized and the connected equipment is protected from fluctuations using Automatic Voltage Regulators (AVRs). Furthermore, the latest designs feature monitoring sensors that track load demand, temperature, and fuel levels in real time, ensuring the equipment always operates at peak efficiency. Such systems can also draw power from external sources when required; therefore, they can be easily integrated into the energy management system of a house, business, or industry. The components are well coordinated to ensure the system operates efficiently, and maintenance is performed at regular intervals.
Typical Components of a Generator
Importance of Proper Maintenance
The performance, lifespan, and reliability of a generator depend entirely on proper maintenance. Ignoring regular maintenance can cause a lot of trouble, such as reduced effectiveness, increased fuel consumption, higher repair costs, and so on. A perfect example is engine lubrication to minimize wear and tear, which is best achieved through frequent oil changes, filter replacement, and component inspection. Getting the fuel system checked and cleaned is an additional step to prevent complications such as blockages and pollution that can obstruct the power generation process. In accordance with industry rules, regular Automatic Transfer Switch (ATS) and control panel system tests should be carried out to ensure a smooth power supply changeover when problems occur.
Also, it is essential not to forget about battery health, as this is one of the main factors that will be hidden. If a battery is not adequately cared for, it may die, leaving no power when the generator has to be started. The technical investigations show that corrosion, weak connections, and the lack of charge cycles are the primary factors significantly hampering battery longevity. In addition to these, it is essential to regularly inspect electrical components, such as wiring and the power factor controller, to identify the cause of poor electrical performance. The use of a comprehensive maintenance schedule will help operators reduce the risk of system failure and ensure the generator operates at peak efficiency when required.
Common Reasons Your Generator Will Not Start

Fuel Issues
When there is little or no fuel, the fuel is old, and/or the fuel line is clogged, the generator will not start. It is essential to ensure the fuel tank is correctly filled and that the fuel is of good quality.
Battery Problems
A discharged or weak battery is one of the prevalent causes of non-starting. However, an oil level too low may be the cause of your generator not starting.
Dirty Air Filter
A blocked air filter can also interfere with engine airflow. When the generator has difficulty starting, check and, if necessary, replace the filter.
Spark Plug Failure
If the spark plug is soiled or not correctly connected, the generator might not start. Open the spark plug socket to assess its condition and replace it if required.
Oil Level Issues
Among the many components of a generator, one of the most common on/off devices is the low-oil-shutoff sensor. If the oil level is very low, the generator will not start as a security measure. Monitor the oil level and fill it up if needed.
Circuit Breaker or Switch Position
The circuit breaker or the control switch could be set incorrectly. Verify that all switches are in the correct positions according to the manufacturer’s startup instructions.
Fuel Problems and Solutions
Contaminated Fuel
Dirty fuel is the reason that generators often will not work. Over time, gasoline can either deteriorate or become contaminated with water, dirt, and other particles. This will cause the line and the carburetor to become plugged, which, in turn, can make the engine perform poorly or prevent it from starting at all. This problem will be solved by creating a routine that includes, amongst others, checking and switching the fuel and using a fuel stabilizer to maintain the quality of the stored fuel. It will also solve the problem if the fuel and the backup are of the same high quality.
Clogged Fuel Filters
The function of fuel filters is to prevent unwanted particles and impurities from entering the engine. These filters can stack up, impeding fuel flow. Lack of power and difficulty starting the engine are common problems when the filter is installed with too many particles. Consequently, you must not only change the fuel filter at the right time according to the manufacturer’s maintenance program but also inspect it frequently.
Fuel Line Blockages
Blockages in the fuel pipe can be caused by rubbish, dented rubber, or old, dry fuel. This behavior reduces fuel flow to the carburetor, exacerbating the issues by causing difficulty starting and reduced power. Check the condition of the fuel lines regularly to spot potential obstructions, damage, or twists. Actions like flushing the fuel lines or replacing damaged parts will yield the same result: the engine will continue to run at maximum.
Airlocks in the Fuel System
A significant disruption in fuel flow can result from air in the fuel line, preventing the generator from working. After the generator has been completely emptied or refueled improperly, this can happen. The solution to this problem is to bleed the fuel system according to the manual instructions to expel the air and set the fuel flow back to the proper level.
Fuel Pump Malfunction
If all other fuel system issues have been addressed, but the generator still will not start, it could be a bad fuel pump. The fuel pump, which is not working, will also not pressurize or deliver fuel efficiently. Check the pump and replace it if needed. Regular checkups on the system and the engine, along with monitoring for unusual behavior, are helpful ways to prevent premature failure of the fuel pump by replacing it at the proper intervals.
Battery Issues: Diagnosing and Fixing
Watch out! The battery is probably the culprit when the generator plays up, and you often find this out when the generator is left idle or is operated in very tough environments. The generator is quite literally dead when the battery is either very weak or totally dead, so it is imperative to check the battery’s condition and maintain its integrity. To begin monitoring the battery’s voltage with a multimeter, a fully charged generator battery should usually register a voltage between 12.6 and 12.8 volts. Any voltage that drops below the range could require the battery to be recharged or replaced.
⚡ Battery Maintenance Checklist
- Check battery voltage with a multimeter (should read 12.6-12.8V when fully charged)
- Inspect terminals for corrosion or loose connections
- Clean corroded terminals with a baking soda solution
- Look for physical damage such as swelling or leaking
- Verify cold cranking amps (CCA) meet manufacturer requirements
Whenever possible, you should check the battery terminals first for erosion or loose connections, and check for power flow issues if these compounds cover the terminals. In case of any accumulation, use a non-corrosive terminal cleaner or a baking soda and water solution to clean the area, and check the connections to ensure they are tight and secure. Moreover, batteries that are swelling, leaking, or showing physical damage need to be replaced as soon as possible to avoid further problems in the system.
It may be necessary to perform in-depth diagnostics. In some cases, this will involve a battery cold-cranking amps (CCA) check, which indicates the battery’s low-temperature starting ability. The generator’s minimum CCA requirements, as provided by the manufacturer, should be verified to ensure they are met. Another step toward prolonging the battery’s life and ensuring the unit’s reliable operation is to perform regular battery maintenance—this involves periodic voltage testing, maintaining a proper state of charge, and storing the battery in a controlled environment when the generator is not in use.
Engine and Maintenance Checks

Start by examining the oil level and quality to ensure the engine’s maximal performance, as insufficient or deteriorated oil may lead to engine wear and reduced efficiency. Do frequent air filter inspections for debris or clogging, as this will ensure proper airflow to the engine for combustion. Inspect the fuel system for leaks or contamination, and use only clean, top-quality fuel to avoid damage. Also, thoroughly seal the belts, hoses, and connections; this will allow you to achieve complete retraction during machine operation. The scheduled manufacturer’s maintenance should, in addition, focus on recommended intervals for oil changes, filter replacements, and component inspections to increase the engine’s lifespan.
Inspecting Spark Plugs
In most internal combustion engines, the spark plugs are among the most essential parts of the ignition system, as they produce the spark. First, carefully remove the spark plug with the appropriate spark plug socket and check its condition. Significant signs to keep an eye on are electrode erosion, carbon formation, and the shade of the insulator tip; the last, on top, gives a clue to the engine’s overall activity and air-fuel mixture. The inscaled insulator tip, in a light tan or grayish-brown color, commonly indicates ideal combustion, whereas a black soot deposit suggests a rich fuel mixture or an ignition issue. The opposite is true for the white or blistered insulator, which most of the time indicates overheating or pre-ignition.
Spark Plug Color Guide
- Light tan or grayish-brown: Perfect combustion
- Black soot deposits: Rich fuel mixture or ignition problems
- White or blistered: Overheating or pre-ignition conditions
When changing spark plugs, make sure the new plugs meet the criteria specified by the engine supplier, such as gap size, heat range, and thread length. Using the wrong spark plug type may cause the car not to start correctly or lead to misfires, resulting in long-term engine damage. Do not forget to adjust the torque during installation to avoid the plug threads being stripped or over-tightened. Spark plugs usually need to be checked or replaced at the service intervals specified in the owner’s manual, which are generally between 20,000 and 100,000 miles, depending on the engine make and model. Regularly checking and maintaining spark plugs will not only improve engine performance but also extend its lifespan.
Regular Oil Level Checks
One of the core maintenance activities of engine care is checking and maintaining the correct oil level, which not only ensures proper engine performance but also prevents damage. This oil is crucial because it lubricates the internal components, absorbs the energy generated by friction, and disperses the heat. Low levels can accelerate wear on engine parts, leading to overheating and catastrophic mechanical failures. Besides, overfilling the oil can cause frothing, thereby reducing lubrication effectiveness.
One should check the oil level frequently, ideally once a month, or before long trips, to maintain the same level of performance. Many times, new engines come with an oil level sensor or a monitoring system, though the good old ways, like checking the dipstick, are still, if not more, reliable. By the way, the highest-mileage oil change can be achieved with modern synthetic oils. The maximum of 10,000 miles is within the normal range for the best-quality synthetic oil. Choosing the correct oil, according to the manufacturer’s instructions, is what everyone should do to keep the engine running well and in good condition.
Cleaning Air Filters
Proper air filter maintenance is crucial for a car, as it directly affects gas mileage and vehicle performance. Pleated paper or cotton gauze air filters are typically used in modern vehicles to trap dust, dirt, and other contaminants before they reach the engine. Over time, these air filters may become clogged, allowing only a little air to pass through and causing the motor to run less efficiently.
According to the latest industry standards, a span of 12,000 to 15,000 miles is considered the interval to the next air filter check, though this may vary depending on driving conditions. Dusty or sandy environments can require frequent check-ups and filter changes. The availability of advanced reusable air filters made with top-quality materials and with a long lifespan makes cleaning and reinstallation an option instead of a completely fresh filter, thereby improving cost-effectiveness throughout the vehicle’s life.
Cleaning or changing air filters involves removing the air filter housing, which is usually secured with clips or screws. Reusable filters are cleaned with specialized agents, and then the filters are completely dried to maintain better performance. When replacing disposable filters, it is essential to use a new filter that matches the manufacturer’s L specifications exactly. In this way, the engine will not be overstressed, the air-to-fuel ratio will be correct, and harmful mixtures emitted through the exhaust gases and polluting the atmosphere will not be present.
Step-by-Step Troubleshooting Guide

- Check the Fuel Supply
It is necessary to ensure that the fuel tank is filled and that it is not a byproduct of any obstruction. Use the fuel from the last time the generator was used; if it is not fresh, empty it and fill it with fresh fuel.
- Examine the Battery (for Electric Start Models)
After you make sure the battery is secured and charged, if it is dead or faulty, facilitate the process of recharging or replacing it.
- Inspect the Spark Plug
Remove the spark plug and check for damage or excessive wear. Clean or replace the spark plug if it is dirty or corroded. Ensure the spark plug is tightened correctly.
- Verify the Air Filter
The air filter should be examined for dirt and blockages. Follow the manufacturer’s instructions to clean or replace the filter. Be informed that the spark plug is the same!
- Test the Ignition System
Make sure the ignition switch is in the correct position. Fifth, if the generator is not yet operational, check the ignition system for defects – the owner’s manual has instructions that are detailed about that stage.
- Assess the Oil Level
Most modern generators are equipped with a low-oil sensor that disables starting when there is not enough oil. Check the oil level and refill if needed. Double-check the use of the correct oil type.
- Consult the Manual for Error Codes
It would be more helpful to interpret the error codes that the generator’s diagnostic indicators may show. Then, look them up in the manual for their respective meanings and fixes.
Using Diagnostic Tools
Diagnostic tools are crucial for identifying and resolving generator issues effectively. They are already built-in in most of the modern generators and if they are not a variety of external devices can be utilized to access the onboard diagnostic information. These tools help make highly accurate voltage, frequency, and continuity measurements of electrical components, including the stator, rotor, and control board. For example, the diagnostic system can indicate that a particular generator was stopped due to a flood of negative system alarms in a short period of time. Besides real-time readings, troubleshooting mobile applications, combined with technical specification databases, reduces the time needed for repairs and ensures that all work is carried out in accordance with the manufacturer’s standards. Thus, the correct use of diagnostic tools will minimize downtimes and, in turn, improve operational reliability.
When to Seek Professional Help
There are times when the help of an expert is essential to handle technical problems effectively when they are complicated. A case in point is when diagnostic equipment reveals severe operational abnormalities in the system—such as failures of the hardware, continuous occurrences of software issues, or detected discrepancies that are out of regulatory requirements—a skilled technician is the right person to consult right away. Technicians have in-depth knowledge, their own tools, and the ability to access specialized databases, which makes pinpointing and correcting mistakes accurate. Moreover, system inefficiencies occurring intermittently or errors persisting despite all troubleshooting steps being undertaken might be signs of hidden problems that should be investigated through a thorough process. Another way to avert the escalation of system-related issues is to have regular maintenance performed by certified technicians, which will, at the same time, ensure the system operates with optimal performance and reliability for a long time.
Preventative Maintenance for Your Generator

🔍 Regular Inspection
Always run visual checks for wear, damage, or leaks. Inspect the whole line of fuel, connections, and the condition of the engine or generator itself.
🛢️ Oil and Filter Changes
Follow the manufacturer’s scheduled intervals: change oil and filter (s). This way, nothing can accumulate, and hence the generator will operate effectively.
🔋 Battery and Electrical System
To ensure the battery’s status, one must test it occasionally. If the test is positive, it means the battery is charging and that the functioning parts are both ok. Battery-connected cables should be checked for corrosion and loose attachments.
⛽ Fuel System Management
Damaged fuel is not an issue if it is kept fresh and its properties are maintained with the help of additives. If the fuel is already old, the only proper solution is to drain it; otherwise, it may cause problems, such as clogging the system or wasting fuel.
🏃 Exercise the Generator
To avoid fuel stagnation and ensure the entire system’s operability, follow the manufacturer’s outline and make a habit of periodically running the generator.
Regular Oil Level Checks
Keeping the oil at an appropriate level in your generator is essential for proper operation and protecting the engine from significant damage caused by insufficient lubrication. Check the oil level before each use or at least once per month, depending on the generator’s use. Use the dipstick to ensure the machine has the correct oil level, and if it is low, fill it with the manufacturer’s recommended oil. Excessive dirt or darkening of the oil indicates the need to change both the oil and the filter, which is done periodically every 50 to 200 hours of operation, according to the user instructions. Keeping track of gradual oil consumption is also part of the prevention, enabling early detection of potential problems such as leaks or deterioration. Always locate the generator on flat ground level to take accurate oil measurements and prevent irregular distribution that may result in premature engine wear.
Cleaning Air Filters: A Simple Guide
Regularly cleaning the air filters is essential if you want your generator to run at its maximum. The air filters keep dust, dirt, and other particles from entering the engine, reducing efficiency or increasing wear and tear. Check the instruction manual of your generator first, find where the air filter housing is installed, and follow the cleaning schedule mentioned there. Cleaning should be done every 100 to 200 hours or more often if the air is very dusty.
When servicing a generator’s filter, you must first power off the generator and ensure it is thoroughly cooled. Also, remove the air filter carefully so no dirt enters the intake system. For foam or reusable filters, gently clean them in lukewarm soapy water and rinse them thoroughly. Then let it dry completely before applying a light oil layer with foam filter oil that will increase its dust-collecting capacity. Replace the filter if it is damaged, torn, or extremely dirty, and no further cleaning can be done. With paper filters, just give them a light tap to remove the loose particles, but replace them if they are too clogged or torn.
Scheduling Routine Inspections
Regular planned equipment inspections are crucial to the completeness and longevity of machinery, and they provide the opportunity to identify and resolve potential defects before they develop into costly problems. The industry strongly recommends that the intervals for inspecting air filters, fluid levels, belts, and hoses be the same as those stipulated by the manufacturer. For example, air filter inspection is recommended every 12,000 to 15,000 miles, or more often in high-dust and debris environments. Similarly, monitoring is a must, including fluids such as engine oil, coolant, and hydraulic systems. It should be done monthly or according to operational hours to keep performance at its best. The data points out that sticking to these inspection schedules would significantly reduce the probability of unexpected downtime; thus, it indicates that the company is achieving both high efficiency and safety protocols.
Reference Sources
Troubleshooting Generator Sets using Expert System:
Key Findings: This paper explores the use of expert systems to diagnose and resolve generator issues, particularly when the corrective team lacks sufficient knowledge.
Root-cause diagnostics of generator service failures:
Key Findings: This research focuses on diagnosing service failures in generators, highlighting issues such as running-frequency resonances and insufficient blocking.
Frequently Asked Questions (FAQs)
❓ Why won’t my generator crank, or the starter motor fail to turn?
The top three most common reasons for a car’s generator failing to start are a weak battery, corroded connections, and solenoid failure if the generator doesn’t crank or the starter motor doesn’t crank. In another scenario, you might notice that the battery is not generating power if it has not been charged or is old. The age of the battery is a significant source of energy loss and quite a common occurrence, but it might still go unnoticed, as with the engine or fuel. Hence, the condition of the battery, the terminals free from dirt, the correct battery size, and the right connections for that particular generator are the items to be thoroughly inspected. Once the initial voltage is seen, a mechanic can confirm it by testing the starter and solenoid.
❓ What are common reasons why a generator won’t start related to fuel?
One of the most common reasons for your generator’s malfunction is fuel problems: namely, old fuel, clogged fuel lines, or a tight fuel valve can cause the engine to fail to operate. At the lowest part of the carburetor, old gasoline can create blockages in the bowl or jet, so the best option is to use new gas. If that’s not available, remove the carburetor bowl and clean it with carb cleaner. Due to clogging from old petrol, the fuel line or fuel valve should be checked for possible damage, and all obstructions must be cleared from the fuel line.
❓ Why does my small engine or Generac generator fail to start after sitting?
Small engines, for instance, many models made by Generac, have a common issue when they do not start right after being left alone: the gas goes bad, gums up the carburetor and jet, and the flow to the bowl becomes blocked. The whole problem is often fixed by performing the carburetor drain and bowl clean procedure: remove the debris, then use carb cleaner to clear the jets and passages. Another thing to do is to check the fuel valve and fuel line for clogs or varnish built up from stale gasoline, and replace filters when necessary. The reason for not starting, including an engine oil sensor or a low oil level, is common across many models that have a safety shutdown. If your generator is a tough starter, it’s time to have a mechanic check for seized or damaged internal parts.
❓ How can I troubleshoot when the carburetor bowl is clogged or the jet is blocked?
If you notice a clog at the bottom of the carburetor bowl, the first thing you should do is close the fuel valve, remove the bowl, and inspect it for varnish or debris; then apply carb cleaner and clean the jet and passages. The carburetor drain can be very helpful, as it can remove old fuel or gunk, and the engine may run again with just bowl and jet cleaning. Possibly, after carefully reassembling and replacing gaskets and float parts if they are worn out, you can avoid flooding or starvation problems, as a damaged float can still cause them. If neither carb cleaner nor manual cleaning does the trick, the carburetor may need a rebuild kit or professional service to prevent the engine of the small saue from stalling.