
Generators are critical for ensuring uninterrupted power supply during outages or in areas without reliable electrical infrastructure. To maintain their functionality and extend their lifespan, it is vital to have a clear understanding of the replacement parts and accessories required for proper maintenance and operation. This article provides a comprehensive guide to the essential components and supplementary tools that every generator owner should consider. From ensuring routine upkeep to being prepared for unforeseen repairs, this detailed overview will help you keep your generator running efficiently and effectively while minimizing downtime.
What Are the Essential Generator Replacement Parts?
Understanding the Different Generator Parts
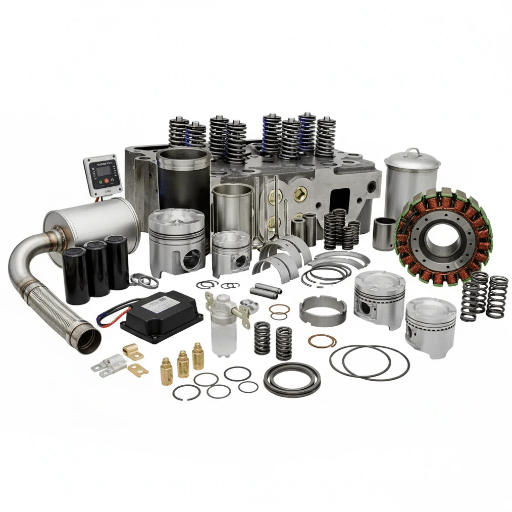
While looking into the parts of a generator, I pay special attention to the most fundamental components that guarantee the generator works effectively. The major parts include the engine, alternator, fuel system, voltage regulator, cooling and exhaust systems, and control panel. Each of these elements plays a critical role:
- Engine: The generator’s engine is the most important part as it transforms fuel into mechanical power. Common fuel types include gasoline, diesel, natural gas, or propane. Furthermore, the power of the engine is quantified in either horsepower (HP) or cubic centimeters (cc), which determines the amount of electricity the generator produces.
- Alternator: The alternator has the responsibility of changing the generators mechanical power into electric energy. In order to achieve the best results, I make an effort to check that the the alternator does indeed have a corresponding power rating with that of the generator, which is given in kilowatts (kW).
- Fuel System: This pertains to the fuel lines, the fuel tank, and the fuel pump. A properly designed fuel system ensures consistent fuel delivery, while the tank’s size dictates the time the generator can operate without needing extra fuel.
- Voltage Regulator: Voltage fluctuations can severely damage appliances. This part ensures a predetermined, steady voltage is supplied, which helps avoid critical damage.
- Cooling and Exhaust Systems: This class of systems skips the overdue maintenance of overheating and safely gets rid of combustion by-products. A coolant level check, also referred to as exhaust clearance, must be done periodically to ensure compliance with the operating temperature limits and environmental safety policies.
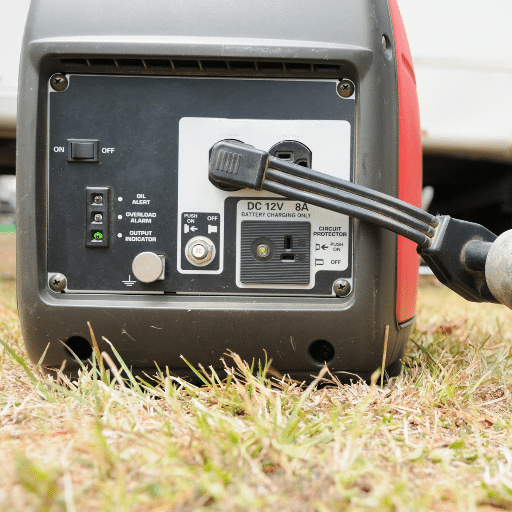
- Control Panel: The control panel provides functionality for monitoring and controlling the generator. Important factors including output voltage, frequency (normally 50Hz or 60Hz), and load levels are presented on the panel. Greater models have digital controls along with an automatic start-stop ignition.
From what I gather, knowing these parts and their specific technical details guarantees that my generator operates effectively, reliably, and with minimal complications.
How to Identify Genuine Replacement Parts
To maintain your generator’s peak performance and ensure its longevity, accuracy in replacement parts is paramount.
- Labeling by the Manufacturer: Check if the part number or any specifications provided by the manufacturer are correct. For instance, a replacement filter needs to be the exact model cross-filter set, so the model number has to match the filtration capacity and material standards.
- Composition of Materials: Evaluate the material that forms the part. Usually, fakes use low-grade materials like soft plastics incapable of withstanding operational stress, whereas authentic parts are made out of high-grade steel or susceptible metals containing chromium designed to last ages.
- Verification from Vendors: Purchase parts only from distributors or retailers that are approved and endorsed by the manufacturer. Purchasing from third-party stores or dubious retailers exposes the buyer to increased counterfeit parts.
- Warranty with Documentation Supplied: Certified parts should come with a manufacturer warranty guaranteeing them alongside a user manual detailing each function. Reasoning these documents should validate the authenticity of parts voiding counterfeit suspicion.
Following all the steps in detail and verifying with the associated technical criteria will allow you to ascertain accurate components while maintaining the integrity of your generator.
How to Maintain Your Portable Generator?
The Importance of Regular Maintenance and Replacement
The correct operation and maximum service life of a portable generator are achieved through routine servicing and timely changes of critical parts.
- Oil Level and Quality: Check and change engine oil every 50 – 100 hours of operation or according to the manufacturer’s recommendations. This maintains lubrication and prevents internal damage.
- Condition of the Air Filter: Maintain or replace the air filter to promote free-flowing air for optimal combustion efficiency after 200 hours of use.
- Functionality of the Spark Plug: Clean the spark plug once every 100 hours to ensure easy ignition and strong ‘first start’ sparks.
- Fuel System Maintenance: To prevent clogging of components, empty fuel tanks after 30 days or more to maintain fuel freshness.
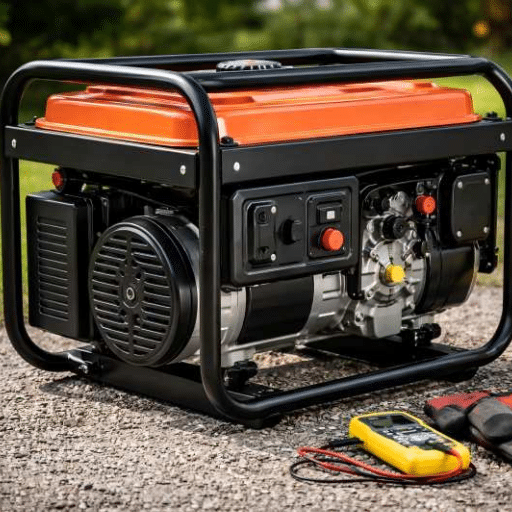
- Voltage Output: Make sure to check the voltage output periodically using a multimeter to guarantee it does not fall below or exceed the recommended limits stated in the manual.
The implementation of these approaches allows me to maintain my generator’s operation, safety, efficiency, and technical functions by promptly replacing worn parts.
Using a Maintenance Kit for Best Results
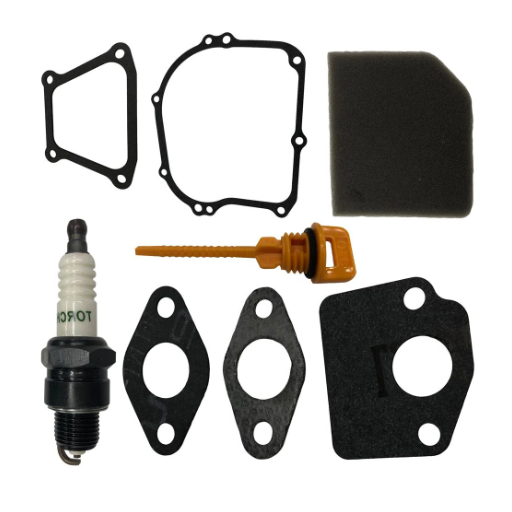
Implementing a maintenance kit is important in aiding the optimal performance and longevity of a generator. Normally, a maintenance kit contains basic supplies, such as air and oil filters, spark plugs, and engine oil that complies with the manufacturer’s requirements.
- Oil Compatibility: Ensure that to use an engine oil with the appropriate viscosity (10W-30 or 15W-40) and operating temperature range as described in the manual. Lubrication within these range values prevents wear and increases the engine’s lifespan.
- Air Filter Replacement: Change air filters as detailed in the manufacturer’s service manual, typically every 100-200 operational hours or more frequently in dusty environments. Clean air filters enable better fuel combustion and improve the air-fuel ratio.
- Spark Plug Gap: Ensure spark plugs are fitted with the proper gap, which usually ranges from 0.028 to 0.031 inches (consult the manual for the exact gap). It is critical to properly gap the spark plugs to facilitate proper ignition and efficient combustion of fuel.
- Oil Filter Installation: Change oil filters with every oil change or as specified elsewhere to ensure clean oil circulation and prevent contamination of internals due to dirty oil. After fitting, always check for leaks.
Following these guidelines and incorporating the best possible parts from the maintenance kit preserves the generator’s performance, operational safety, and reliability over time.
How Do You Replace a Generator Carburetor?
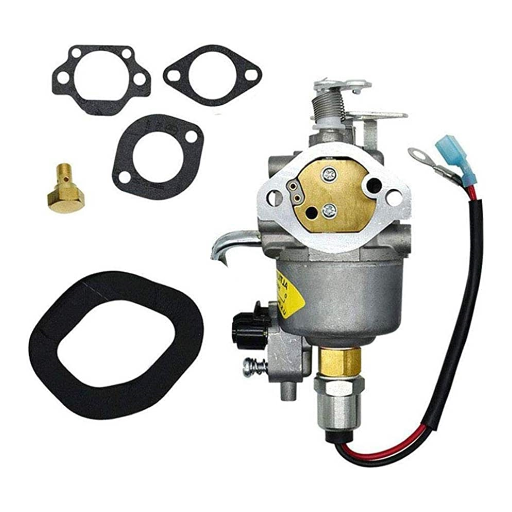
Identifying the Right Carburetor and Gasket
It is advisable first to study the owner’s manual thoroughly because it contains detailed information on your generator’s make, model, and specifications with respect to the part numbers and their suitable alternatives.
- Engine Model Number: Verify that the carburetor is compatible with the series and displacement of your generator’s engine.
- Carburetor Throat Diameter: Intake aperture clearance must also be factory calibrated, normally in millimeters; this is the case for air intakes.
- Compatability of Mounting: Confirm that bolt holes align with the schematic of the generator and can be mounted in that position favorable for proper fitment.
- Fuel Delivery System: Ensure the type of fuel the carburetor is designed to support (gasoline, propane) corresponds with the accepted range and calibrated jet size.
- Gasket Design and Material: A gasket should withstand temperatures and pressures encountered during normal operation. Gaskets of Nitrile rubber, a heat-resistant polymer, or high-grade fiber composite are suitable choices.
Optimization of performance while preventing operational inefficiencies or engine damage is achievable through accurate selection of the mentioned components and backsplash verification against OEM parts.
Step-by-Step Carburetor Replacement Guide
- Prepare the Workspace and Gather Tools: Make certain the vehicle rests on a flat surface and the engine is completely cool to mitigate any hazardous risks. Collect essential utensils such as wrenches, screwdrivers, pliers, and carburetor cleaner. In addition, keep the replacement carburetor and the gaskets or seals needed handy.
- Disconnect Battery and Fuel Lines: Disconnecting the battery comes first to eliminate any chances of electric shock. Remove the fuel lines from the carburetor carefully while using a rag to soak any excess fuel. During the disconnection, make sure that no dirt gets into the fuel system.
- Remove Linkages and Vacuum Hoses: Remove the throttle linkage, choke cable, and all other operational attachments while marking their positions for reassembly. In the same manner, vacuum hoses should be removed, but care must be taken to avoid damaging the fittings or creating unintentional leaks.
- Detach the Old Carburetor: Unscrew the mounting bolts or nuts that hold the carburetor to its manifold. Steadily remove the unit while ensuring not damage the mounting surface. Inspect the intake manifold to check if there are any debris or residue and clean it so that the new component can be secured properly.
- Install the New Carburetor: Position the old carburetor so that it corresponds to the replacement carburetor, ensuring that a new gasket matching the vehicle’s specifications is carefully placed over the intake manifold. Tighten the screws with the specified torque to avoid both, proper seating and over tightening. Common bolt torque for mounting is 15-20 ft-lbs, but this may differ according to the vehicle manual.
- Reconnect Linkages and Hoses: Connect the throttle linkage and choke cable with vacuum hoses to their respective ports. Ensure there is no stiff binding during all ranges of movement. Verify that every connection is tight and filed into place.
- Reconnect the Fuel Lines and the Battery: Check that the fuel lines are reattached securely and inspect these lines for leaks. Put back the battery terminals turned off and restore power.
- Adjust And Test The Carburetor: Manufacturer’s guidelines should be followed when modifying the air-fuel screws along with idle speed. The initial screw should be turned out 1-1.5 turns from the resting position. The rest of the settings are modified once the engine is started; check for smooth and responsive idling along with throttle performance during testing.
- Conduct a Verification and Safety Examination: Inspect for any possible fuel or air escapes, and make sure all parts are intact after being installed and all systems are secured. After that, complete a road sample to validate that the engine is functioning correctly with an optimum load, along with checking for no irregular sounds or actions.
An effective and precise replacement of the carburetor can certainly be accomplished by abiding to the described steps alongside believing the advance instructions as specific technical requirements, including mixture changes and precision torque settings.
What Are the Signs You Need New Generator Parts?
Common Symptoms of Worn-Out Parts
In my experience, the diagnosis for most generator component repairs stems from recognizing power output issues. For instance, a noticeable reduction in productivity is a major sign, especially when the generator does not maintain the required voltage under load, because that is an indicator of problems with the alternator or the voltage regulator. Some measurements of voltage can indeed fluctuate, but then they have to remain within certain bounds, usually plus two percent minus two percent from the rated voltage.
Unusual sounds such as knocking, grinding, and squealing point to some bearing with components that are either loose or are drive belts that are worn down. These mechanical parts have to be sieved through, especially regarding the tolerances against manufacturer clearances that are oftentimes mentioned in the service manual.
Excessive fuel burn with regards to normal levels of consumption per kilowatt hour indicates clogged injectors or a carburetor that has gone haywire, however, burning fuel incessantly is already an issue of concern.
Remarkable amounts of high oil consumption alongside severe overheating are often a hint towards internal components being worn out, take cylinder walls or piston rings for example. The oil pressure and operational temperatures heavily require supervision, however, these two values need to be optimal to the engine specifications in performance for the most results.
Lastly, problems with the generator’s starting functionality, especially with prolonged cranking attempts, points towards starter motor problems, battery issues, or complications within the ignition system. Maintaining proper voltage levels on the battery will determine if replacement or charging is indeed required.
With accurate diagnostics, symptoms can be analyzed and compared to the relevant benchmarks, which makes it possible to quote faulty elements that can be removed and replaced.
How to Test Generator Components for Performance
In assessing the performance of generator parts, I would take a systematic approach starting from the basic examination of electrical and mechanical systems. First, I would view the generation’s output voltage and test it under load conditions. For typical single-phase generators, the output is expected to be in the region of 110 to 120 volts for 120V system or 220 to240 volts for 240V system. Any deviation from these ranges could indicate a problem with the alternator or voltage regulator.
In addition, I would determine the frequency of the generator using a frequency meter. The output frequency for most systems should ideally fall around 60Hz (or alternatively 50Hz in regions where that is the norm). If there are deviations, it may point towards some mechanical issues like a low engine speed which can be fixed by adjusting the governor settings.
Finally, for industrial type generators, I would measure the insulation resistance using a megohmmeter. Generally, anything above 1 megaohm would be acceptable but it does differ depending on the manufacturer. Periodic testing of this value is useful in averting electrical shorts or failures.
As the last check, I would confirm that all wiring connections are secure and examine the cooling system to make sure it is functioning properly since overheating can negatively affect performance. Following these diagnostic procedures and checking the technical specifications during the tests will allow me to confirm that the generator components are functioning correctly.
When to Replace and When to Repair
Deciding if a component needs replacement or repair is straightforward only after evaluating its condition, performance data, and costs. It is economically reasonable to replace a device if the insulation resistance is below 1 MΩ and visibly deteriorating, even after reconditioning. Similarly, to prevent eroding reliability from operational risks, components that do not maintain rated voltage stabilization during load tests should be replaced.
As for other mechanical components, the limits and tolerances, alignment, and vibration limits should also be studied. They should be replaced if radial and axial play goes beyond the prescribed limits or if vibration monitoring shows frequencies associated with damage. Along those same lines, rotating cooling fan blades with cracks or an imbalance that causes vibration exceeding ISO 10816 v1 standards must also be replaced.
Economic considerations are also critical—when the expenses associated with maintenance exceed fifty percent of a new component’s cost, the component is usually replaced. Repair must be decided only after testing confirms the malfunctioning component can be returned to full operational compliance within predefined acceptable performance tolerances. With these strict technical criteria and reasonable choice principles, optimal system reliability and cost efficiency can be guaranteed.
Why Is the Manual Transfer Switch Important?
Benefits of a Manual Transfer Switch
The manual transfer switch is indispensable in efficient power allocation and management during outages. This device’s primary advantage stems from its ability to control the shifting of utility power to backup power sources, thereby averting system harm due to erroneous electrical contacts. The device increases safety as well by removing the generator from the electrical grid network, reducing danger from risks such as backfeeding and surging.
- Ampacity Rating: not exceeding the electrical load demand of the device to avoid burning or failing due to excess heat.
- Voltage Compatibility: the device must be compatible with the voltage output of the generator and requirements of the service panel, e.g., 120 / 240 V for single-phase systems.
- UL Certification: The device has to comply with the relevant standards of reliability in electrical safety (for instance UL 1008) control operating of misuse energy.
- Mechanical Durability: able to withstand frequent manual operation, robust housing, moisture, and heat.
Following the described conditions ensures that the manual transfer switch protects the electrical systems while remaining efficient and easily manageable, giving users full control over power continuity during critical situations.
Installation Tips for Your Generator
Making sure your generator is properly installed is important for performance optimization as well as safety. The instructions below emphasize certain guidelines and technical details:
- Selection of Site: Mount the generator to non-combustible and well ventilated flat surfaces. Additionally, maintain a clearance of at least 5 feet from buildings and windows in order to reduce the likelihood of carbon monoxide buildup per NFPA 37 standards.
- Wiring and Electrical Connections: Use fitting cables tagged for the generator’s output (for instance, 10 gauge for 30 amps).
- Load Assessment: Check the total wattage for the constituent appliances and equipment. Also, make sure the output rated by the generator (measured in kWs) alongside the surge capacity is capable to fill these requirements without exceeding 80% of the continuous load capacity.
- Grounding: Ground using a ground wire and rod system. Ensure safe electric discharge with an ohmmeter to check the continuity for proper grounding verification.
- Protection from Elements: Use NEMA rated weatherproof cases 3R or higher for each unit and install them to safeguard against snow, rain and direct sunlight.
Following these recommendations and complying with the relevant electrical and safety standards will ensure the reliable and safe operation of your generator during usage periods.
Reference sources
Frequently Asked Questions (FAQs)
Q: What essential parts and accessories should I have for my generator?
A: Essential generator parts and accessories include filters, spark plugs, carburetor gaskets, recoil starters, and handles. These components ensure your generator runs smoothly and efficiently.
Q: How often should I replace the filter in my generator?
A: The filter should be replaced according to the manufacturer’s recommendations, usually every 100-200 hours of generator running time, to maintain performance and reliability.
Q: What is the importance of a carburetor gasket in a generator?
A: A carburetor gasket is crucial for sealing the carburetor to prevent fuel and air leaks, ensuring efficient engine performance and longevity.
Q: How can I improve the performance of my inverter generator?
A: To improve the performance of your inverter generator, regularly maintain it by replacing worn parts, using high-quality fuel, and ensuring all components are functioning correctly.
Q: What should I do if my generator’s recoil starter is not working?
A: If your generator’s recoil starter is not working, inspect it for damage or wear. Replace it with a new one from an authorized dealer to get your generator running again.
Q: How can I determine if I need a new generator handle?
A: If your generator handle is cracked, broken, or uncomfortable to use, it may be time to replace it with a new one to ensure safe and easy transportation.
Q: What role does the starter key play in a generator?
A: The starter key is essential for initiating the generator’s operation. It completes the electrical circuit needed to start the engine.
Q: How do I ensure my standby generator is always ready to operate?
A: To ensure your standby generator is always ready to operate, perform regular maintenance checks, replace parts as needed, and keep an inventory of essential parts you need for quick replacements.