
Installing a generator transfer switch is a critical step in ensuring a seamless and reliable power supply during outages. This expert guide provides a detailed overview of transfer switch installation services, highlighting their importance, functionality, and key considerations. Whether you’re a homeowner aiming to secure your property from unexpected power disruptions or a business owner seeking uninterrupted operations, understanding the role of a transfer switch is crucial. This article will explore the types of generator transfer switches, the installation process, safety standards, and how to select professional services near you. By the end, you’ll be equipped with the knowledge to make informed decisions about installing a transfer switch tailored to your specific needs.
What is a Generator Transfer Switch, and Why Do I Need One?
Understanding How a Transfer Switch Prevents Electrical Hazards
A transfer switch protects you from electrical hazards while ensuring dependable power during outages. It separates the generator from the main utility supply to avoid backfeeding power that could harm utility workers or damage electrical infrastructure. With voltage isolation, only one power source, be it utility power or generator power, can be operational at any given time.
- Voltage Rating: Different transfer switches have different rated voltages. Make sure it is compatible with the generator’s output voltage. For most residential settings, it is usually set at 120/240V.
- Amperage Rating: The switch must support the maximum current being drawn, which, depending on the load, could range from 30A to 50A or more for your electrical panel or generator.
- Type: Choose between manual transfer switches where the operator is required to select the active source in case of a power outage or Automatic Transfer Switches (ATS) that automatically detect outages and switch power sources without requiring operator intervention.
- UL Listings and Safety Compliance: The switch has to be guaranteed UL 1008 safety certification to be used in residential or commercial constructions.
Using a transfer switch, I can now work with a generator while avoiding overloads, electrical backfeed, or system damage. It is clear that choosing and installing a solidly rated transfer switch is neither a defensive measure nor a mere convenience – it is an investment in dependable power system management.
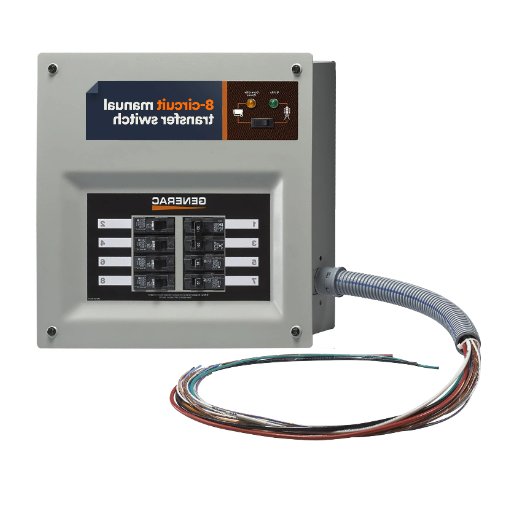
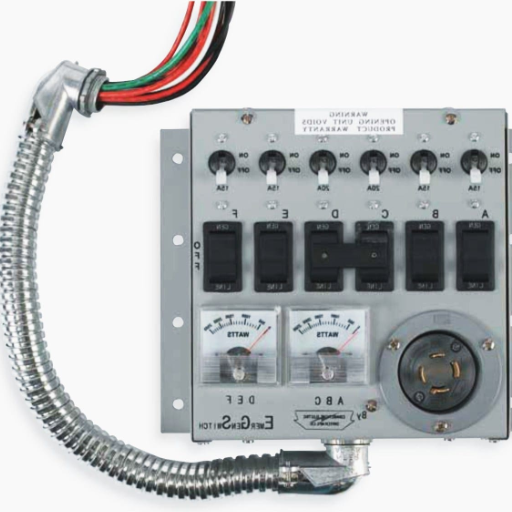
Types of Transfer Switches: Manual vs. Automatic Transfer Switch Options
Like many other things, the selection of transfer switches will depend on a person’s distinct needs, preferences, and features.
Manual Transfer Switch
- Operation: Relief Efforts require physically switching the loads to the generator during powerless periods.
- Cost Efficiency: Manual switches are much cheaper than automatic ones so it is great for people with tighter budgets.
- Power Capacity: Usually accommodates residential or small commercial generators. Load capabilities are ordinarily between 50A and 400A, which is enough for moderate demand.
- Control: Allows supervision and burdens of control and out prioritization in load supervision.
Automatic Transfer Switch(ATS)
- Operation: Scanning of power loss and switchover to the generator’s supply takes very little time.
- Advanced features: Many models are offered with microcontrollers for voltage and frequency monitoring of turbine generators.
- Power capacity: Faster switchover capacity, generally more than 50A and up to 800A. A switch above 800A is very much suitable for the construction of power entities.
- Convenience and safety: Best for critical operations where drastic and swift action needs to be taken, hospitals and data centers among others.
Generally, the decision will most likely depend on weighing out the expenses, the degree of uninterrupted power needed, and the weight of the load. For situations that require fast and dependable transitions, I prefer automatic transfer switches. On the other hand, manual switches are better suited for low-priority applications that are cost-sensitive.
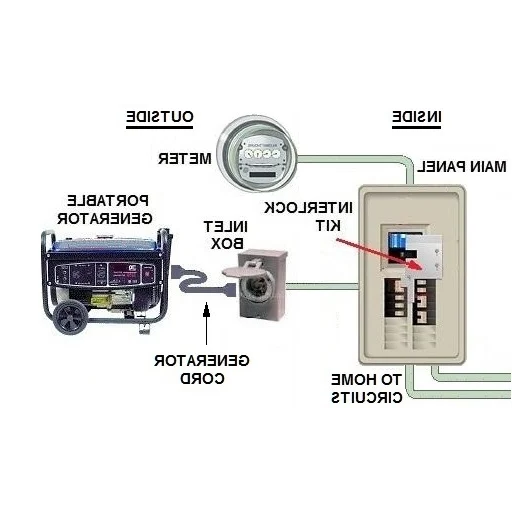
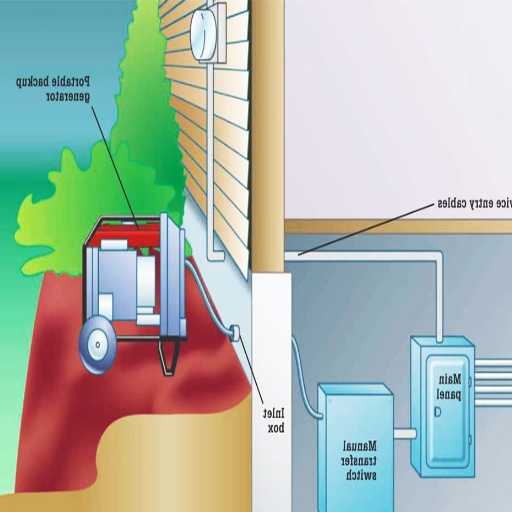
How a Transfer Switch Allows Safe Connection to Your Home’s Electrical Service
A transfer switch avoids power source leakage by integrating your household electrical service and a power generator. Backfeeding, which is a hazardous phenomenon where the power from the generator spills back into utility supply lines, is stopped. There are two types of transfer switches, manual and automatic, each suitable for different cases.
- Settings thresholds: A transfer switch must fit the voltage rating of your residence, 120/240V to a given relative level.
- Power rating: The device’s amperage must be equal to or higher than the switching value of your electrical panel, which is set at 100A, 200A, or higher for a fully loaded turn on without failure of the switch overheating burned out overheating.
- Wiring schematics: It is possible to choose a transfer switch of a single phase or three-phase configuration depending on the customer wirig, most residential in this area are single-phase.
- Marked for use: Check that the transfer is capable for the UL standard 1008, which deals with the safety and quality of transfer switches.
With the given the corresponding capabilities of the single family dwellings, these auxiliary power can be integrated from a transfer switch ensure reliability and safety.
DIY vs. Professional Generator Transfer Switch Installation: What You Need to Know
Safety Considerations When Installing a Generator Transfer Switch
While installing a generator transfer switch, my initial concern should always be abiding by the safety standards and electrical codes so as to minimize risk. First, I need to ensure that the main power source is turned off to eliminate the chances of electric shock and short-circuiting. Circuits which are live or working pose great dangers, and all installations should be done with the power off.
Second, I also need to confirm that the transfer switch is compatible with the rest of the home systems, including the generator. This entails checking if the switch’s amperage rating will serve my system’s needs. For instance, a typical household may need either a 30-amp or a 50-amp transfer switch, depending on the most critical appliances that need power.
Finally, I have to confirm that the switch complies with UL Standard 1008, which assures that the apparatus is capable of safe and efficient load transfer. Grounding and wiring faults add danger, and so does improper capturing of electrical wires.
In conclusion, to maintain safety throughout the entire process, it is important to use the right equipment and materials, such as insulated screwdrivers and wire connectors. If there is not enough experience or confidence in doing the installation, it would be best to get a qualified electrician to do the work to ensure it is done properly and meets the local standards.
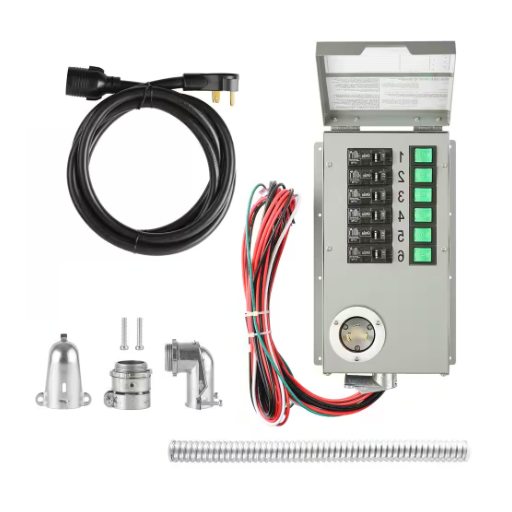
Tools and Materials Required for Transfer Switch Installation
In addition to completing the required steps to install a transfer switch, I must gather the tools and materials that adhere to safety and technical requirements:
- Transfer Switch: Depending on the generator and home power needs, a transfer switch rated UL listed for the load it will handle, typically 50 amps or 100 amps (e.g, 50 amps or 100 amps depending on the generator and home power needs).
- Generator Power Cord: A contractor grade weatherproof power cord that is rated for the generator output and in common use are 30 amp or 50 available depending on the type of generator.
- Insulated Screw Drivers: Screwdrivers fitted with plastic or rubber handles for protection from electric shock when working with live parts of the circuits.
- Wire Stripper and Cutter: Implements for cutting wire and stripping insulation for the cuts for ease of connection.
- Electrical tape: Wire insulating tape of good quality with UL American label number to cover wires and any conductive part that is exposed.
- Wire connectors: The right size wire connectors or wire nuts terminals also rated for the amperage and wire gauge being attached.
- Circuit Tester: Instruments to be used are with built-in coincidental conductivity q transduction tools: multimeter with extern vi oor without wires, voltage dip tester to ensure the cut is made on the circuits before working on them and to control if the voltage is passing after working or installing on it.
- Drill with Bits: Needed for making new holes to mount the transfer switch or conduits regarding the switch needing a powered drill with an assortment of bits.
- Conduit and Fittings: Assembled conduit systems with matched fittings are complete and comply with code requirements. They have been approved for use in the protection of wiring.
- Load Evaluation Sheet: For the effective load division to the switches based on critical circuits in the home, loads are calculated individually for each switch.
Tools and materials need to be examined for condition and must be qualified for the particular power and safety standards specified for the project. Moreover, it is essential for all parts to conform with National Electrical Code (NEC) provisions and regional laws to eliminate any safety risks.
When to Call a Professional Installer
For safety reasons, if the electrical work is complex or dangerous, an installer must be called in for assistance. These include specialized tasks like upgrading service panels, installing circuits rated above 20 amps, or working on multi-phase power systems.
Also, these tasks will often include high-tech devices like smart homes, emergency backup power systems, etc., that need expert supervision to ensure that proper configuration for safe incorporation into existing infrastructure is enforced. Failure to comply with non-technical standards, such as voltage tolerances (120V or 240V for residences) or ground fault protection in wet areas, can lead to serious safety issues or failure of the system altogether.
To sum up, any doubts related to local building regulations, safety checks, and the reliability of the whole installation or components are the signs that tell you to hire an electrician. The consequences of unqualified handling can be large from receiving a fatal electric shock or fire to being fined which is often more than the expense required to get a professional.
Generator Transfer Switch Installation Costs: What to Expect
Factors That Affect Installation Costs for Different Generator Types
There are many factors to consider in estimating the total cost of installing a generator transfer switch. For starters, the type of generator will have an impact on the cost. Standby generators, for instance, cost more because they require extensive wiring, an automatic transfer switch, and often, a subpanel for efficient transitions between power sources. Standby generators are also more sophisticated and need professional grade installation to integrate with the electrical grid in the building. On the other hand, portable generators are less complex and only require a manual transfer switch.
- Wattage Rating of the Generator: Bigger generators, typically over 10kW, require more robust transfer switches and thick wiring, which increases the labor and material expenses.
- Type of Transfer Switch: While manual transfer switches are less expensive, they require the user to operate them, unlike automatic transfer switches, which add convenience but are much more advanced and expensive.
- Existing Electrical Panel Capacity: If an electrical panel is already in place, and it is unable to carry the load of the generator, then upgrading to a larger panel or installing a subpanel becomes a necessity, which increases the price.
- Installation Location And Wiring Distance: Increase in distance between the generator and the transfer switch require extra wiring, and may require trenching or conduit work, and all of this drives up the cost.
- Neighborhood Construction Rules and Approvals: Following the building regulations may involve inspections for certain materials, and permits increase the overall fee.
With this information, I can determine the approximate costs related to the installation of generator transfer switches specific to your situation. Every detail must comply with safety protocols and engineering fundamentals for optimum setup efficiency and reliability.
Additional Expenses Beyond the Basic Installation
If one estimates the expenses beyond the simple setup of a generator transfer switch, these elements usually come to mind:
- Replacement of Wiring or Panel and Upgrades: If the currently available electrical panel does not support transfer switch installation, then a compatible panel upgrade is likely needed. This is so that the system meets the load demand and code requirement.
- Balance and Load Calculations: The in-depth load calculation may require further payment. This step is crucial in determining the necessary circuits alongside making sure that the generator capacity is within working range. Some of the factors that need analysis include wattage ratings, peak demands, and simultaneous usage.
- Surge Protective Devices: The installation of surge protectors is meant for power switching and can guarantee safety for connected devices and equipment as per IEEE C62.41 compliance.
- Integration of Automatic Transfer Switch: If an automatic transfer switch (ATS) is selected, more sophisticated integration to the generator system is often needed, which includes what is referred to as synchronizing, relay wiring, and other settings, driving up costs.
- Remote Tracking Systems: The Use of remote monitoring tools to track generator performance will require additional equipment and possibly subscription service with the solution selected.
- Added Installation Time Charges: Longer, more complex installations that require changing the structures mean added labor that may incur extra overall costs.
I can guarantee a dependable and budget-friendly installation for your needs by checking these aspects and confirming that they meet the technical requirements (for example, compliance with the NEC code, load requirements of the manufacturer).
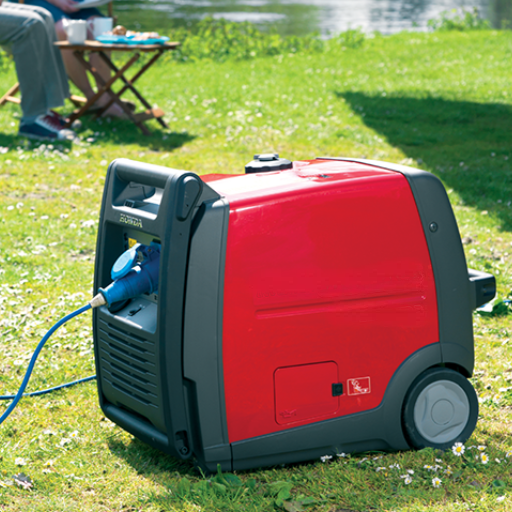
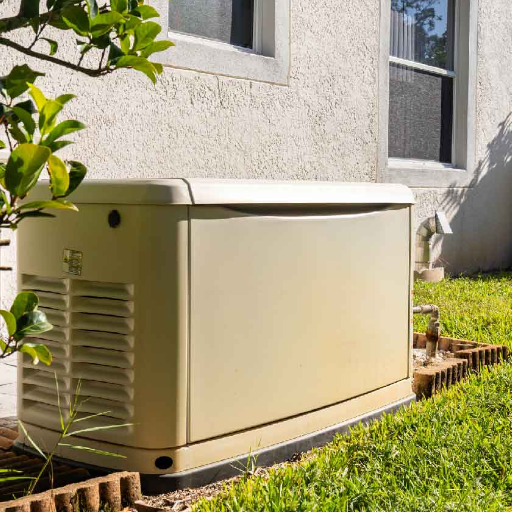
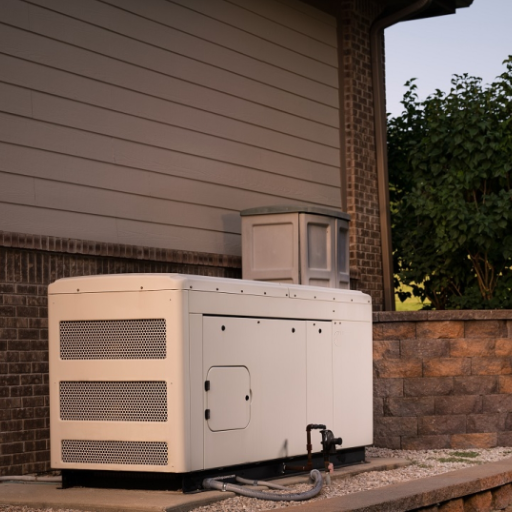
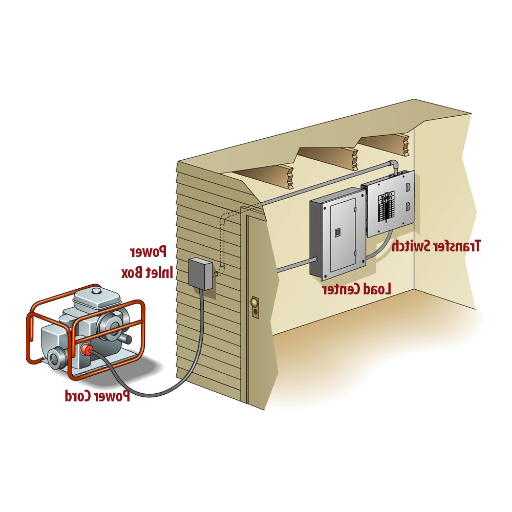
Portable Generator vs. Home Standby Generator Installation Costs
The primary differences in the costs associated with installation for portable and standby generators rest with the ease of the setup and its associated technical requirements. As opposed to home standby generators, portable generators usually involve lower installation costs, which is mainly due to the use of a basic transfer switch and little to no alterations to the electrical system. Home standby generators, on the other hand, require comprehensive installations like an automatic transfer switch, upgrades to the electrical panel, the placement of the generator fitting major load requirements, along many other repairs.
- Load Evaluation: A specialized load using standby generators should be performed so that it is confirmed generator can adequately supply the basic circuits during a power outage without generating overloading.
- Transfer Switch: In most cases, portable generators utilize a manual transfer switch while home standby units operate through automatic transfer switches.
- NEC Code: A compliance with National Electrical Code is required for both types, however, home standby installations might need more comprehensive inspections and permits.
- Connection: Unlike portable units, which can use propane or gasoline, a dedicated natural gas or propane line is required for home standby generators, which increases the installation cost.
- Site preparation: Standby generators may have special siting requirements, such as a designated spot or a concrete pad for installation, which can mean extra work in terms of materials and labor costs.
I make sure that these technical aspects are well managed to provide safe, reliable, and fully compliant installations for your requirements.
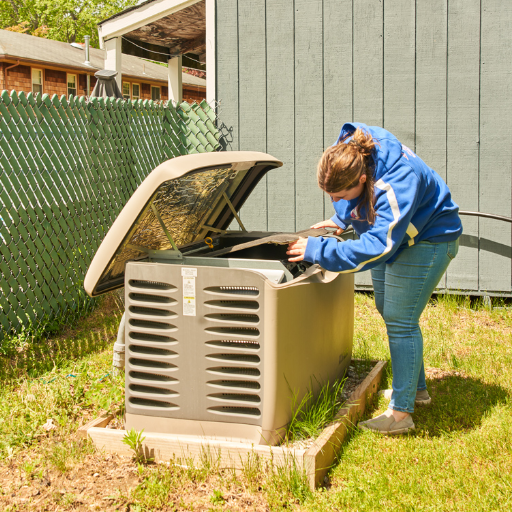
Step-by-Step Process of Professional Transfer Switch Installation
Initial Assessment and Choosing the Right Location for Your Transfer Switch
While looking for the ideal site for the relocation of the switch, I focus on a number of important factors that I identify during the first stage of the assessment. To begin with, I verify that there is a minimal distance between the transfer switch, the generator, and the main electrical panel because this greatly simplifies the wiring and decreases the voltage drop. Normally, the ideal distance between these parts is as small as is practically possible while still observing local regulations.
In addition, I check that there is adequate wall space for securely mounting the transfer switch at the desired location. This region has to allow adequate maintenance and accessibility clearance which, in most cases, follow the National Electrical Code (NEC) that specifies a minimum width clearance of 30 inches and depth of 36 inches. Also, this placement must be inside a building or a weatherproof enclosure if it is mounted outside, depending on type of switch and weather conditions.
Lastly, I make sure the proposed site is adequately grounded and that all relevant electrical codes for the grounding conductor size and electrodes are met to guarantee safety and reliability of the system. I aim to define a location that delivers the best balance between functionality, safety, and compliance with all regulatory requirements.
Connection to Your Breaker Box and Critical Appliances
Connecting the generator to the critical appliances and the main power panel takes a good level of care when it comes to both safety measures and technical details accuracy for a practical outcome. Almost always, a power transfer relay switch is placed on the wall socket behind the generator. This switch can cut the power coming from the utility and prevent backfeeding. When putting together an automatic or manual transfer switch, it is necessary to confirm that the system’s amperage rate is within range. Smaller systems are usually 30 amps, while whole-house systems can go up to 200 amps.
To size and prioritize the connections efficiently, the loads for each critical appliance must be identified. For example, refrigerators and recycling supermarket freezers usually need shallow levels of power ranging from 600-800 watts, whereas some sump pumps require up to 1500 watts while they run. There is also the need to consider the heating and cooling appliances, such as air conditioning systems, whose power usage varies greatly from as low as 2000 to 5000 watts, depending on the system size and efficiency.
To get the correct wire sizes for specific connections as defined in the National Electrical Code (NEC), a 30 amp circuit usually uses a ten gauge wire while a 50 amp circuit uses six gauge wire. In addition, it is very important to remember that the breaker in the panel that is set should also be equivalent to the maximum ampacity of the power transfer switch and the auxiliary wiring being connected.
Every appliance has its power requirements which must be checked, and electrical codes must be complied with in order to safely and effectively connect your generator to the breaker box and the appliances. This lowers the chance of overloading circuits yet still managing safety measures.
Final Testing and Verification to Ensure Proper Operation During Power Outages
For your generator system to function effectively while the main power source is unavailable, a few steps need to be followed meticulously to ensure everything works properly.
- Simulated Power Outage: Start by disabling the central source of energy and turning the generator on. Confirm that the power supply switch connects automatically (if the system is an automatic one) or manually engages as expected.
- Border Control Testing: Test each key appliance linked to the generator one by one. Check whether the kilowatt/ amp output from the generator meets or is above the required load expecting value threshold.
- Power and Rate Stabilization: The charge should then be checked with a Thrust Multimeter, focusing on paired output voltage (for example, check 120 or 240V, depending on the system) and frequency (standard is 60Hz in the United States). If the generator output is beyond the volatility region of 5% of established boundaries, then there’s a problem with the output, possibly due to ineffective load equalizing; beyond the set point, it will cease effective functioning.
- Examine Circuit Breaker With Canals: Check that all set circuit break points operate appropriately during testing. There’s a need for thermal imaging to detect where the wiring has high temperature zones that can indicate questionable conjunctions or overloaded circuits that feature poor links.
- Battery and Fuel System Inspection: For units utilizing electric starts, check the generator battery voltage for proper startup function (usually 12V DC for many models). During this time, check fuel levels for expected usage duration and visually inspect fuel lines for leaks.
These procedures, along with preventative maintenance of the generator system, assist me in having power outage reliability. Always consult a professional for components of advanced diagnosis such as voltage regulators and transfer switches to ensure proper operation.
Common Problems and Troubleshooting After Transfer Switch Installation
Dealing with “Access Denied” or “Permission to Access” Error Messages
Encounters with “Access Denied” or “Permission to Access” messages during transfer switch and circuit breaker installations indicate that everything about user permissions and access control requires basic checking. A fundamental review includes looking into administrative level permissions on user devices, along with making sure that control of the transfer switch software or control panel is being done at the higher level.
Should the problem continue, I check on the validity of communication of the network such as the IP address, subnet mask, and gateway. In certain cases, I check whether the given security information (username and password or encryption key) is the one needed for the session. If there are encryption methods like TLS 1.2 or higher, I check if both sides of the system are prepared and properly configured to these encryption methods.
- Voltage and Power Supply: Configurations that guarantee the switch utilizes the correct input voltage (i.e. 120V or 240V) must be performed.
- Firmware\Software Compatibility: The level of switch firmware and the accompanying control software must be matched to verify their compatibility.
- User Account Control Settings (Windows): Set up UAC to allow the required Transfer Switch privileges to the UAC application.
- Firewall Configurations: Check the utilized communication port numbers to see if they need to be permitted and add exceptions if they do.
Through systematic reframing of the factors, I can fix most access or permission errors while protecting system security and operational integrity.
Addressing Generator-to-Transfer Switch Connection Issues
To solve problems associated with the generator and the transfer switch, I first check if the generator is compatible with the transfer switch. This entails analyzing if the generator’s voltage and phase are within the facility’s electrical parameters. For instance, if the generator produces 240V of single-phase power, then the rated voltage and phase of the switch must match.
Next, I check all the wiring connections to ensure they are up to standard. Important factors include checking if the neutral and ground connections are sufficiently separated to avoid ground faults. For example, bad grounding can create unwanted voltage differences, which are dangerous.
I also check the transfer switch’s amperage rating to ensure that it order of the generator’s output. If the generator supplies 50 amps, then the transfer switch must be rated above 50 amps in order to not be damaged by excess load. If the switch is too low, there is a high chance of overheating or failing when the ow is applied.
Finally, I conduct operational checks, like pretending the power goes out, to make sure the transfer switch moves from utility power to generator power with no holdups or mistakes. If problems linger, I go back and check the system’s technical limits and look through the manufacturer’s instructions for additional troubleshooting.
Reference sources
Frequently Asked Questions (FAQs)
Q: What is a backup generator transfer switch, and why do I need it?
A: A backup generator transfer switch is a critical safety component that connects your house generator to your home’s electrical system. It prevents electricity from your generator from back-feeding into utility lines, which could be deadly for utility workers. When properly installed, a transfer switch allows your generator to keep essential systems running during outages, providing peace of mind during emergencies. Whether you need to power your entire home or just critical appliances, a proper transfer switch installation ensures safe operation and compliance with electrical codes.
Q: Can I install a generator transfer switch myself, or should I hire an electrician to install it?
A: While DIY installation might seem cost-effective, hiring a licensed electrician to install your transfer switch is strongly recommended and often required by code. Professional electricians understand the complexities of connecting to your breaker panel, ensuring proper load distribution, and meeting local electrical codes.
Q: What types of transfer switches are available for home backup generators?
A: There are primarily three types: manual transfer switches, automatic transfer switches, and interlock kits. Manual switches require you to physically flip the switch when the power goes out. Automatic transfer switches detect outages and switch to generator power automatically, providing seamless transition. Interlock kits are more affordable options that modify your main breaker panel. Your choice depends on your budget, convenience needs, and the size of your generator. A professional electrician can help determine which type best suits your electrical needs and home backup requirements.
Q: How much does professional transfer switch installation cost in the greater Houston area?
A: In the greater Houston area, professional transfer switch installation typically ranges from $500-$1,500, though costs may vary based on several factors. These include the complexity of your electrical system, the type of transfer switch (manual vs. automatic), accessibility issues, and whether your installation requires additional electrical upgrades. Some companies offer package deals when purchased with a generator. Many service providers in greater Houston offer free quotes and consultations to provide an accurate estimate for your specific situation.
Q: How long does a transfer switch installation typically take?
A: Most standard transfer switch installations take 3-5 hours when performed by a qualified electrician. However, this timeframe can vary depending on complexity. If your installation requires running new wiring, working with a natural gas line for a permanent generator, or addressing complications in your existing electrical system, it may take longer. Many electrical service providers in greater Houston offer same-day service for standard installations, but complex installations might require scheduling over multiple days.
Q: Will installing a transfer switch affect my home’s electrical warranty or insurance?
A: A properly installed transfer switch by a licensed electrician should not negatively impact your home’s electrical warranty or insurance. Many insurance companies view professionally installed backup power systems favorably as they help prevent damage during outages. However, DIY installations or work done by unlicensed contractors could void warranties on electrical components and potentially create insurance issues if they lead to damage or fire. Always inform your insurance company about your generator installation, as some policies may offer discounts for homes with backup power systems properly connected through transfer switches.