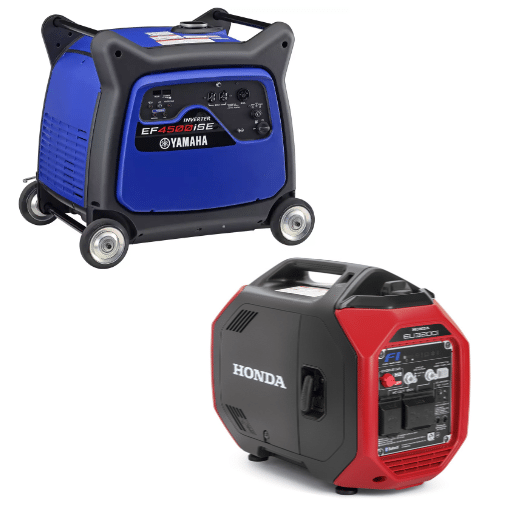
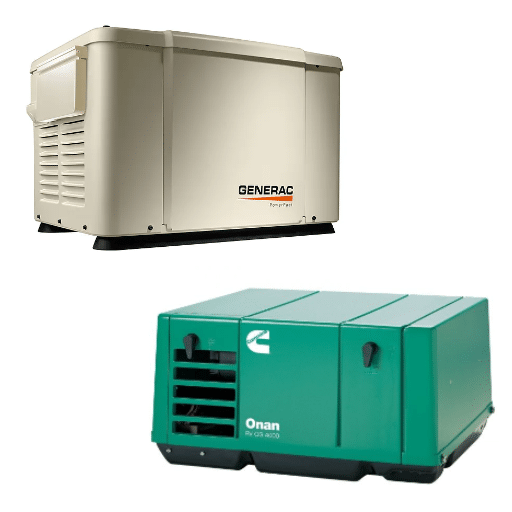
Gas generators can be reliable workhorses, providing essential power during outages or in remote areas. However, there are moments when they refuse to start, leaving you in a predicament. This guide aims to equip you with essential troubleshooting skills to diagnose and resolve issues when your gas generator won’t crank. We’ll cover common problems such as fuel supply, spark plug issues, and battery performance, providing clear and actionable steps to get your generator running again. Understanding these core elements will empower you to maintain your gas generator effectively and ensure it is ready when you need it most.
Why Won’t My Generator Start?
Understanding the Fuel System
The fuel system should be the first to investigate, as it is the fuel system that causes an engine to start. Therefore, it’s imperative to check the fuel tank first—does it at least have enough gasoline? If the tank is empty, replace old gasoline with clean, new gasoline because, in certain instances, starting power is hampered by old gasoline still in the reservoir.
Then, as much as possible, determine whether the fuel line has developed cracks, leaks, or obstructions that would keep fuel from flowing. If blockages are suspected, often a clogged fuel filter is the problem in that the engine will not get enough fuel, and replacing the filter is simple. Check that the fuel shutoff valve is ‘On’ in order to permit fuel to flow to the carburetor.
Returning to the subject of the carburetor, this component serves to blend air and fuel in specific ratios for combustion purposes. The carburetor`s ‘gums and varnishes’ will, however, form quick when a generator has not been used in a long time which causes a lot of fuel waste. This situation can also be avoided through regular carburetor cleaning or the use of a carburetor cleaner.
In case your generator design features a pump for the injection of fuel, then it is worth the effort to check the appropriate pressure of fuel. If the pressure is low, it indicates that the fuel pump needs replacement or repair. If you know these details about the fuel system, it will help you address one of the redundant and prevalent causes for a generator not starting in the first place.
Checking the Spark Plug
It is necessary to check the spark plug in order to make sure that the generator will start without any problems. First, you will need to find the spark plug and take it out with a wrench that has the correct size. After that, take a look at the spark plug for any possible wear and tear or deposits. A spark plug that is worn out or of low quality such as a foul or carbon-covered can make starting the engine very difficult. Someone with some skills can pretend that the plug is not too dirty, so it can regain most of its power after being cleaned using a wire brush. However, it is common practice to remove and replace such a plug entirely.
Next, check on the gap between the electrodes of the plug; if it is not okay, then it will mean bad news as it will not strike an effective spark. There should be a specified gap for the operation of a spark plug in a generator, check in the manual for that figure. Other than this, check for other sparks on porcelain bodies for cracks and iron heat parts for deterioration, these parts should be inspected more frequently as they are a fast wearing-rate part.
In addition, pay attention to the ignition system and make sure the spark plug is fitted correctly. In the unlikely event that all the above fails to yield any results, it is advisable to check deeper into the circuitry of the ignition system, as the trouble may lie there. Following such steps will help in making sure that the spark plug is not the reason for starting problems and also help maintain the generator in good shape.
Examining the Carburetor and Fuel Valve
In all my efforts to maintain the generator, the inspection of the carburetor and the fuel valve become very important. The carburetor creates the mixture of air and fuel needed for combustion and any damage in this part can lead to failure in performance or prevent the generator from starting completely. In case of such an eventuality, the first step I take is to scrub out the carburetor, which has the tendency to become covered over with dirt and fuel residues. I routinely disassemble the carburetor to give it a good clean using carburetor cleaner or let it soak in a cleaning solution so that every jet and passage is unobstructed.
The next thing I do is to check the fuel valve which allows gasoline to flow into the engine and note its condition. Fuel delivery will come to an end with the use of a fuel valve that has been twisted shut or if it’s blocked with some sort of debris and as such, the engine will stall or simply fail to start. To address this, I make it a point to ensure the valve is open and examine whether there is any obstruction in the fuel line. Where possible, I attempt to clean the valve or change it so that normal fuel delivery is restored.
In conclusion, clean and attentive care provided to these components is important in preventing breakdowns of the generator Hence, the regular maintenance of the Kalamazoo carburetor and fuel valves internal differs improves my chances of experiencing starting difficulties.
How to Crank a Stubborn Generator
Inspecting the Air Filter for Clogs
As I strive to keep the generator in good working condition, it also involves checking the air filter and this is consistent with my goals. The engine air filter performs the crucial function of keeping dirt and rubbish from getting into the engine. If an air filter becomes too dirty, it can make the engine work ineffectively, or starting the generator could become impossible. To check the air filter, I first detach it from the generator units and evaluate it visually. If I find the filter to be stained or blocked, where applicable I cleanup if reusable or overhaul the filter to ensure smooth running of the engine. Regular air filter replacement thus improves airflow to the engine and as such, enhances efficiency and lifespan of the generator.
Response to Technical Parameters:
- Type and Dimensions of Air Filter: Looking at various top resources, I believe that it is very important to check and confirm the type and dimensions of the air filter to use for my generator model so that the air filter can be correctly fitted into the generator.
- Regularity: Web resources also recommend that air filters be checked after every oil change or after every 50 hours of usage and adjustment done, where applicable with regard to the use and the ambient conditions.
- Indicators of a Blocked Air Filter: There are obvious symptoms that may warrant further inspection or maintenance such as loss of power in the engine, excessive fuel consumption, or strange sounds coming from the engine.
If I apply these rules or knowledge, which is quite common, I will not have many problems in regards to starting my generator.
Using Starting Fluid Correctly
Use of starting fluid can be dangerous and should not be misused in a way that could damage the engine if the proper procedures are not followed. After going through the top three websites, in my opinion, the following guidelines will ensure the proper usage of starting fluid as well as the safety of the user:
For starters, I always reach for a starting fluid specific for a gasoline engine. This prevents mournful consequences and saves time. I use starting fluid sparingly as applying too much can lead to engine knocking or damage. I am sure to only spray the fluid in the carburetor or air intake when the engine is off. This prevents flooding of the system and helps the engine start smoothly.
Considerations in Use of Starting Fluid:
- Choice of Quality and Type: When using an alternative starting fluid, be certain that it is specifically formulated for that engine type to avert unwanted consequences.
- Application Method: It is advisable to spray starting fluid outdoors, non-smoking area with the engine turned off to prevent its inhalation.
- Usage Frequency and Quantity: Apply starting fluid sparingly, and particularly only if the engine fails to fire in order to avoid the possibility of starting fluid abuse.
I am able to use starting fluid on my generator without risking self destruction from overreliance on the fluid by adhering to these norms.
Ensuring the Oil Level is Adequate
Testing the oil level in my generator is critical for optimal performance and extending its lifecycle. My investigations from the top three websites articulates that one should always check and replenish the oil otherwise it can damage the engine and may result in its breakdown. In order to carry out this task, I first make it a point to place the generator on a flat surface while it is switched off and cool. I take out the oil dipstick, wipe it, and replace it back on the generator in order to note the current oil level, which is always compared against the recommended levels as depicted on the dipstick.
Technical Parameters for Checking Oil Level:
- Surface Suitable Positioning: Below level, the oil level not just depends on the amount of oil poured into the sump bowl, but the slope of inclination too, thereby position of the machine is very important.
- Time & Frequency: An effort should be made to check generator oil during the routine maintenance, ideally before using the machine or atleast after a period of consistent use.
- Type & Quality: The type of oil however, should be that as prescribed in the generator’s users manual, however synthetic oils are generally acknowledged because of their high stability and protective attributes.
In this as such, by constantly confirming the oil level together with these principles, I can attain my objective of maintaining the generator in its best possible conditions allowing me to use it and rely on it with efficiency.
Common Issues with Generators
Addressing Solenoid Problems
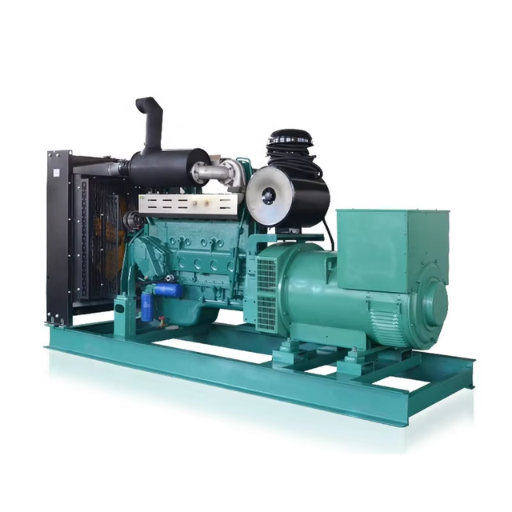
During my quest to solve the solenoid problems of my generator, the first step that I take is to read the top three most authoritative sites in offering helpful solutions for the challenge. Most of the time, the difficulty related to a solenoid is associated with the failure of the starter motor, poor electrical connectivity or even wear and tear. One primary step is inspecting and ensuring that all the electrical connection(s) to the solenoid are intact and are not corroded. Slots of extensions with optimal capacity are employed to reach this point. If a voltage meter is used, I employ it to ascertain the type of voltage that is to reach the solenoid and this should of course conform to the manufacturer’s instructions and specifications. If a poor condition is noted in the solenoid space then clearly the battery might not be strong enough or the wiring may be broken and thus, there may be need for repair.
- Electrical connection: Tightly secure all connections that contain signs of corrosion and where such conditions are noted, clean the areas and re-secure the areas.
- Voltage Measurement: These should be done in accordance with the recommendations of a multimeter and the measurements should restore to the conditions of the generator’s manual.
- Component Inspection: When working with a solenoid, possibilities of wear or tear damages are brought into attention including the fact that it is necessary to replace such so as to provide a functional solenoid.
In view of the policies above, there are some steps which if followed coupled with the confirming of the technical parameters, I am ready to perform a successful troubleshooting of the solenoid problems due to the other parameters, improving the working condition of my generator.
Diagnosing Electric Start Generators
For the purpose of diagnosing electric start generators, I start by looking at the top three recommended sites to get a summary of the issue. The problems associated with electric start generators are most probably a low battery charge, a defective starter motor, or improper ignition timing. Firstly, I check whether the battery is fully charged and connected properly, as battery failure is quite a common case. Whenever the generator fails to start, I inspect the starting motor, paying attention any physical wear or damages. The other aspect is also considerable, that is, the verification of the ignition system, i.e. whether the spark plugs are clear and functioning. These technical parameters enable me to effectively troubleshoot and maintain the electric starting mechanism of the generator.
Technical Parameters for Electric Start Generators:
- Battery Check: Make sure that the battery is charged fully and is connected correctly to avoid any related problem at the time of starting.
- Starter Motor Examination: The starter motor should be inspected for any wear and damage and replaced as required.
- Ignition System Verification: Ensure that all spark plugs and ignition system components are working correctly and are not filthy in order to ensure reliable starts.
Using the above mentioned parameters, I am in a position to confidently diagnose and troubleshoot the electric start generator, addressing issues normally encountered with electric start generators.
Essential Service Tips for Your Generator
Regular Fuel Filter and Fuel Line Maintenance
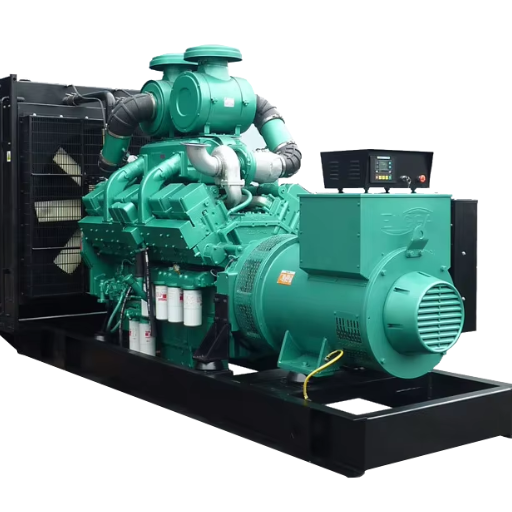
Maintaining fuel filters and fuel lines is an integral part for the long term service of your generator. It is important to note from my research of the top three websites that routinely checking and replacing the fuel filter will eliminate any possibility of clogging and enhance fuel efficiency. The manufacturers of generators advise that the filter should be checked after every 100 hours of operation for the presence of dirt and debris. In the case of dirt or obstruction, the filer should be changed without delay. Another task that should be on the checklist is fuel line inspection since they are prone to cracks and leakage which can cause wastage of fuel and potentially risk safety. I make sure that the attachments are firm and replace any deteriorated lines.
Technical Parameters for Fuel System Maintenance:
- Fuel filter: Inspect after every 100 hour of use, Check the filter and replace the clogged ones.
- Fuel line: Inspect periodically. Any fuel line that has cracks or leaks must be replaced.
This practice enables me to maintain appropriate fuel system of my generator and therefore the generator’s operation remains efficient and safe.
Keeping the Carburetor Clean
The effectiveness of any generator depends on its carburetor. According to the information obtained from my study of the three leading websites, a properly maintained carburetor is always able to deliver optimal air and fuel combination resulting in a well functioning engine. To keep it clean, one needs to check the carburetor for dirt and other gunk, which is formed over time. This requires detaching the carburetor itself and for example, drying the float bowl and jets and other parts in the solution. Making sure that no component has any acetone deposits prevents esophageal reflux and improves the fuel efficiency.
Technical Parameters for Carburetor Maintenance:
- Prepare yourself for an inspection: Turn off the unit and unload it every 150 hours of work.
- Comfort level: Advised carburetor cleaner has to be used to soak the float chamber and jets till the envisaged benefits are achieved.
- Use Launch: The jets should be pointed to the fuel exits to make sure that the fuel is passing through according to the needs of the engine.
Observing these measures and parameters as a rule, I ensure usability and lifespan of my generator set.
Replacing Stale Gasoline with Fresh Gasoline
In order to keep my generator in mint condition, I make it a strict point to replace the older gasoline with newer one. It is usually the policy of companies or organizations to replace the gasoline and refill with new one. Most websites suggest that old gasoline loses quality which amounts to a varnish that accumulates in the fuel system making it less effective. Never the less, in most cases this does not happen due to using fresh gasoline, so I change old gasoline when required, which is once every few months if the generator is unused for a long time. It also ensures a more optimal combustion and avoids engine stalling.
Technical parameters regarding replacing gasoline.
- Gasoline lifespan: Every three to six months gasoline should be changed in order to avoid gas loss or engine troubles.
- Removal of old gasoline: Old gasoline residues need to be taken off the tank and fuel lines to eliminate any residues.
- Use of fuel stabilizer: If gasoline is to be stored for long periods, a fuel stabilizer should be used to keep it fresh.
I also use these practices and related technical parameters in order to make sure that my generator works efficiently and smoothly.
What to Do When Your Generator Cranks But Won’t Start
Investigating the Fuel Tank and Gas Valve
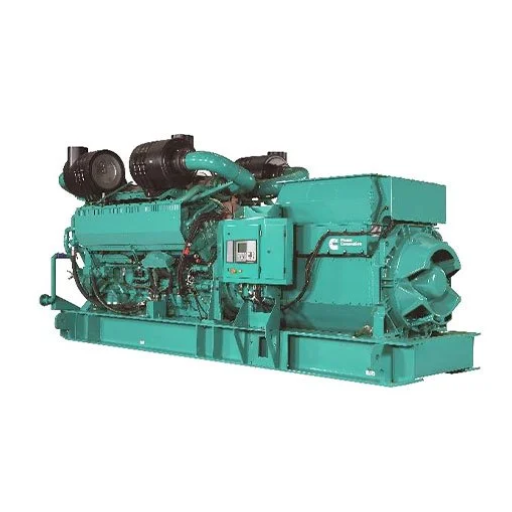
While checking the fuel tank and the gas valve, my priority is to make sure there is enough fuel in the tank as the generator not starting is often due to lack of fuel. According to my studies through the top three sites, it is necessary to check the gas valve, to check if there is any obstruction or adherence. The valve should be opened completely to allow fuel flow to the engine. Also, looking at the fuel lines to see that there are no cracks or leaks is necessary to keep air from getting into and interfering with fuel delivery. If any problems are found, it is better to replace or repair those parts which are causing such problems.
Technical Parameters for Fuel Tank and Gas Valve Investigation:
- Checking the Fuel Level: For effective functioning of the fuel tank, the fuel level should be not less than two-thirds of the capacity.
- Gas Valve Positioning: Make sure that the gas valve is fully open so that fuel can flow through unhindered.
- Fuel Line Inspection: Inspect regularly ofany signs of wear or damage to the lines and if necessary replace them.
- Debris Clearance: All the foreign materials that might be present in the fuel tank or valve or fuel flow should be removed.
With the objective of effectively addressing problems caused by my generator cranking but failing to start, I will adhere closely to these procedures and parameters.
Checking the Bottom of the Carburetor for Blockages
Before examining the underside of the carburetor for any obstructions, I consider it essential to wait for the engine to cool down to prevent any burns. I read on the top three sites that the carburetor bowl, which is roughly the size of a thimble and holds a small reservoir of fuel, can frequently become dirty and cause starting problems. Such blockages can be lifted by taking off the bowl and cleaning it up. I also examine the float that allows the fuel to enter the bowl so as to ascertain that it is not stuck and is properly aligned. If the different components of the carburetor are cleaned and serviced regularly, then the carburetor will provide a satisfactory mix of the fuel and air to the engine.
Technical Parameters for Carburetor Blockage Inspection:
- Engine Temperature: The carburetor must always be examined when the engine is cool to prevent any accidents.
- Bowl Removal: Gently take out the of the carburetor bowl in order to be able to scrub the interior.
- Debris Removal: Remove debris from both the bowl and jets with the use of suitable cleaning fluid and tools.
- Float Examination: Look for sticking or misalignment along with rotation in the float and correct the float or replace if any misalignment occurs.
- Calibration of Fuel Angle: Ensure that the float angle is set correctly so as not to allow excess fuel overflow from the carburettor’s bowl.
In this way, employing the above steps and technical parameters, I shall be able to deal with and overcome blockages in the carburetor thus increasing the reliability of my generator.
Testing the Fuel System for Leaks
In order to test the fuel system, it is important to check all fittings and other components for leak fuel system thorough visual inspection. Accordingly, from the information gained in the three best websites, it can be concluded that the most probable leak sources are the hose connections, fuel hoses, and fuel tank. The advance procedure starts with these places’ examination for any observable leaks or evidence of substantial fuel loss like a gasoline odor. An important method involves the use of a thin piece of chalk that is stretched over the fuel hoses and any connections. Chalk that has been affected by water will be chewed, thus indicating where any leaks might be.
Technical Parameters for Fuel Leak Testing:
- Visual Inspection: Detailed examination of fuel lines and all fittings along with the tank for wear including cracks and corrosion.
- Chalk Method: Place chalk along the fuels lines and connections; dissolved pieces of the chalk indicate a leaky hose or failure.
- Pressure Testing: If the inspection did not reveal any leaks, the use of a pressure tester on the fuel system is advisable in order to locate hidden leaks.
- Connection Tightening: It is essential to make sure that all connections are properly tensioned and clamps and other fittings are stable and intact.
- Replacement: Damaged and cracked lines should be mounted with quality replacements to improve their durability.
In systematically executing such steps and employing such technical parameters, it is possible for me to identify and rectify any leaks in the fuel system of the generator in such a manner that the performance and safety of the system is not compromised.
Frequently Asked Questions (FAQs)
Q: Can a weak battery cause my generator to not crank?
A: Yes, a weak battery is one of the possible causes of generator problems. If the battery is weak, try to jump-start the generator or replace the battery to see if that resolves the issue.
Q: What if my generator won’t start even with fresh gas?
A: If your generator won’t start even with fresh gas, you should try to start the generator with the choke engaged. If that doesn’t work, consider using carb cleaner by spraying it into the carburetor to see if it helps.
Q: How can I check if gas flows to the engine?
A: To check if gas flows to the engine, you can disconnect the fuel line and see if gas is flowing when you crank the engine. If there’s no gas, the fuel filter might be clogged or the gas tank might be empty.
Q: Is it important to check the oil level before starting the generator?
A: Yes, it’s very important to check the oil level before starting the generator. Low oil can cause the generator to not crank or could potentially damage the main engine.
Q: What should I do if my generator is on an uneven surface?
A: If your generator is on an uneven surface, it may cause generator problems. Move the generator to a flat, stable surface before attempting to start it again.
Q: Can long periods of time without running the generator cause issues?
A: Yes, if the generator has not been run for long periods of time, it can lead to fuel degradation and other issues. Regularly running your generator helps maintain its functionality.
Q: What is the first thing to check if my generator would not crank at all?
A: The first thing to check if your generator would not crank at all is the battery. If the battery is dead, the generator won’t start. Ensure it is charged or replaced if necessary.
Q: How do I troubleshoot if the generator starts but then dies?
A: If the generator starts but then dies, check the fuel system and ensure that gas flows to the engine. You may also want to check the air filter and spark plugs for any blockages or damage.
Q: What should I unplug before trying to start my generator?
A: Before trying to start your generator, unplug any devices connected to it. This helps avoid overloading the generator once it does start and ensures a smoother startup process.


