

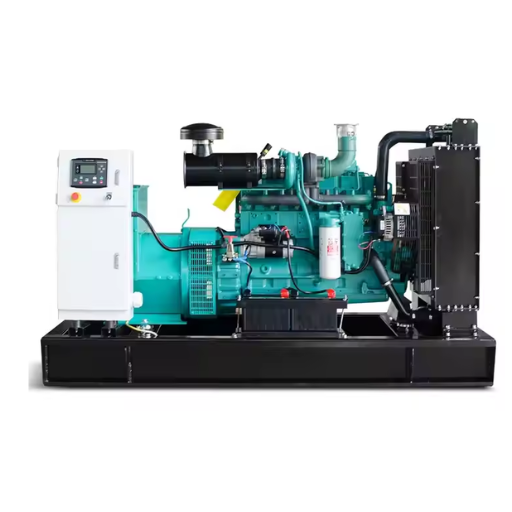
Generators are essential tools for providing a reliable power source in various settings, from residential backup solutions to industrial operations. However, like any machinery, they can encounter issues that hinder their performance. This comprehensive troubleshooting guide aims to equip readers with the knowledge and strategies necessary to diagnose and resolve common generator problems efficiently. By providing step-by-step instructions and highlighting critical diagnostic techniques, this guide serves as an invaluable resource for both novices and seasoned professionals. Whether you are dealing with a generator that won’t start, inconsistent power output, or unusual noises, this article will help you navigate these challenges and restore your generator to optimal functioning.
How Do You Begin Generator Troubleshooting?

What Are the First Steps in a Generator Troubleshooting Guide?
In cases where generators require troubleshooting, the basic steps at the beginning are important to pinpoint the cause of the problem. Such basic steps are frequently given by the leading resources: Here are some of the consolidation steps:
- Verify the Fuel Supply: It is important to check whether the generator has sufficient fuel and if so, whether such fuel is free from contamination. Low fuel levels and such impurities may hamper performance.
- Battery and Electrical Connections: Make sure that the battery voltage is adequate and all electrical connections are intact and free of corrosion. The generator cannot be started if the leads are loose and if the battery is flat.
- Oil and Coolant Levels: Generators need to have oil and coolant levels appropriate to allow them to run efficiently. This is a very important step as failure to do so can result in damage to the engine or overheating.
- The air filter: Similarly, failure to unclog the air filter, or the presence of dirt on the air filter would prevent oxygen from reaching the engine, which would either lessen the effectiveness of the generator or prevent the generator from operating. If the air filter appears dirty, it should be replaced without further delay.
- Errors in the Control Panel: Recent models of most modern generators include control panels that incorporate error code displays. The generator’s manual shows specific error parameters because those codes help the user to determine the nature of the problem precisely, according to the manufacturer’s recommendations.
If these steps are followed in the specified manner, several common generator issues will be easily identified and repaired. However, it is advisable to refer to the user manual of the generator for any model-specific troubleshooting.
How to Inspect the Air Filter and Spark Plug?
1. Inspecting the Air Filter:
- Access and Remove: The air filter is within a housing that can be unscrewed or unclipped. Pull off the housing cover and gain access to the filter.
- Visual Check: Check the air filter for any contamination, foreign material, and cracks. A filter that is clear of foreign material is desirable for maximum airflow; a dirty filter must be either cleaned or disposed of.
- Maintenance or Replacement: For filters that are only slightly soiled or void of moist particulates, moderate cleaning with compressed and dry air may be performed. Replace the filter with a new one if the soil level is high or if it is damaged. Always check for your generator’s specifications on the correct filter.
- Reinstallation: The air filter should be firmly fixed back in position and then the cover secured once the housing is well sealed.
2. Inspecting the Spark Plug:
- Locate and Remove: Find the wire connected to the spark plug and pull out the connector, not the wire itself. Use a socket with a spark plug wrench to unfasten the spark plug.
- Examine Condition: Check the condition of the electrode that has been positioned on the right top side of the spark plug. Look for unacceptable erosion of the electrode and cracks in the ceramic insulator.
- To Make: Those who had a carbon-coated plug that performed well for some time should have attempted to clean it with a wire brush. If this plug does not perform well at any point, it should be replaced. Always consult the owner’s manual for part number/s and model or gap settings.
- Reconnect the Plug: When replacing the spark plug, make sure you hand screw it to avoid any threading issues. After which you can crank it down with a wrench. ‘The set of screws or bolts used to size the spark plug’ is the other term used to battle ‘the wire for re-inserting the socket that should not obstruct the head itself.
The maintenance of air filters and spark plugs will help run the generator smoothly. Regular maintenance as indicated in the manufacturers’ instructions should be adhered to in respect of intervals and specific technical parameters.
What Tools Are Needed for Generator Troubleshooting?
A collection of standard tools and equipment is required to effectively troubleshoot a generator with each serving a specific diagnostic and repair function.
- Screwdriver Set: A set of flat and Phillips screwdrivers will be needed for operations including but not limited to removing the air filter cover or panel enclosures.
- Wrench Set: Used to adjust nuts and bolts especially those found in the spark plug and other mechanical systems.
- Spark Plug Socket: One of those specialized tools needed to properly reinstall the spark plug without damage during installation and removal of the plug.
- Multimeter: This gadget is also useful in the diagnosis of electrical problems as it is capable of taking measurements of voltage, current, and resistance.
- Compression Tester: Employed in determining the internal engine state i.e. amount of compression being created in the engine for optimum operation.
- Oil Filter Wrench: These would assist in the oil filter replacement filled with oil during oil changes to simplify filter changes and oil change maintenance.
- Diagnostic Software or Scanner: With modern generators, some electronic components may be scanned and diagnosed using the computerized tool. This tool enables one to connect with the computerized systems onboard the generator to troubleshoot any faults.
Having these tools ensures that generator maintenance and troubleshooting are properly carried out by the guidelines established in the best sources.
Why Won’t My Generator Start?

How to Check the Fuel and Oil Level?
To ensure that the generator can start as well as run smoothly, it is paramount to check the fuel and oil levels. The process of verifying these levels is quite simple:
1. Fuel Level:
- Open the Fuel Cap: Regularly and gently twist off the fuel cap at the top of the tank.
- Visual Inspection: Stand in front of the tank and check its content by looking up. The fuel level should rise above the level indicated on the sticker to maximize performance.
- Refill if Necessary: For tanks with low fuel levels, the gases should be accompanied by a specific type of gasoline prescribed for the generator to the owner. It is important not to go over the top to prevent spilling.
2. Oil Level:
- Locate the Dipstick: Find the oil dipstick; it is hopefully on the block of the engine and should be near the side of the engine.
- Remove and Wipe: Unscrew the dipstick and wipe it off with cotton or any soft cloth before putting it back into the hole.
- Check and Refill: Remove the dipstick and take it out again to gauge oil levels. The levels should ideally be in between low and high levels. Oil can be added as per the need and one has to make sure that only oil which is permissible by manufacturer is used.
When performing these checks, confirm that the generator is in a horizontal position and that the engine is not running for the purpose of obtaining accurate results. If these steps are adhered to in addition to carrying out the necessary checks, the generator should have sufficient fuel and oil levels necessary for it to operate properly.
What if the Choke Valve Switch is Mispositioned?
There is a high chance that if the choke valve switch is out of place, my generator will either not start or not run properly. According to the best online resources, the choke valve is used to regulate the amount of air present in the fuel-air mixture at the time of starting the engine. The pitcher’s head is also commonly referred to as a washer’s choke. Before starting the engine, the washer’s choke should be closed during a cold start. This would restrict the engine’s airflow and increase the amount of fuel in the mixture. When an engine is warm, or once it’s started, the washer’s choke should remain open to allow for airflow to the mixture and ensure that the combustion process is efficient.
In addressing this issue, I would first:
- Find the Right Position: I need to consult the user’s manual of the generator to know the proper position of the choke during startup and operation
- Fix Appropriately: I should then adjust it according to the temperature and operating conditions and place it as per the manufacturer’s recommendation.
By ensuring the choke valve is placed in the correct position, I am confident I will save my generator from starting issues and getting damaged due to improper running conditions.
Could the Carburetor Be Clogged?
We are certain that whatever the case may be, it is worth examining the carburetor if a problem arises. Such problems can vary greatly, but research shows that a burst or clogged carburetor leads to similar underlying problems of the engine consisting of poor performance and interrupted engine flow making it seem like a rough stall when idling. It is worth noting, however, that the issue here stands with the presence of a blockage in the fuel line originating from the fuel itself in most cases. The three primary steps to switching out carburetors include:
- Inspecting and Cleansing the Carburetor: Remove the carburetor by utilizing the manual provided with my generator, and walk around the plan. Then I can spray out parts and basins with carburetor cleaner to ensure any build-up remaining on the mechanical parts doesn’t fail to disappear.
- Adjusting the Air-Fuel Mixture Screws: The screws that control the air available to the engine as well as the fuel that is going into it. If those screws are tightened/loosened towards the directions that are provided other than factory conditions then the expected performance from the machine might not be reachable.
- Fuel Filters should be changed frequently: Said fuel can prove to be a possible source of debris which further can add up to be a single connected disturbance within the carburetor, this is because clogged filters could potentially alter the entire line, and so it good practice to keep them clean. In this way, consistent usage should dictate the number of times the filters have to be treated.
By focusing on these topics, it is possible to improve the functioning of the carburetor and the generator operation.
What Are Common Generator Problems and Their Solutions?

What to Do If the Generator is Running Roughly?
When my generator is not operating properly or is running roughly, I have to find out what the core problem is in order to fix the problem effectively. From the information obtained from several top websites, this rough running may be attributed to a dirty air filter, improper fuel mixture, or even faulty spark plugs.
- Verify that the Air Filter is Clean: An excessive accumulation of dirt on the air filter will result in less air intake and in effect improper combustion. The filter should be taken off and viewed. If it is indeed filthy, its performance can be improved through washing or replacement.
- Look at the Fuel System: You must check if I am using the correct fuel in the first place and also check the tank for water or any other debris. This can lead to spillage of the fuel intake. Yes, emptying the tank and refilling it with fresh gasoline may fix the problem.
- Study the Spark Plug: A spark plug that has been used for a long time is usually dirty and this results in uneven running of the clogging engine. The spark plug is a major aspect of precaution, I need to pull it out and scan it for repellents and grinding. If it is new and it is not signed with the technical characteristics of the generator, then the operation is less likely to be smooth.
I can improve performance by systematically checking these parts, the generator will run as it’s meant to, and will also run more efficiently and at a lower cost.
How to Address Generator Overheating Issues?
In dealing with tasks concerning generator overheating, my focus would, however, be on the intervention strategies and the target reasons as stipulated by some of the highest recommendations available. Following is the advice I can be provided with those highly reputable sites:
- Ensure Adequate Ventilation: Proper ventilation is a necessity to avoid overheating situations. I should check the location of the generator since it should not be placed in an enclosed space prone to airflow obstructions.
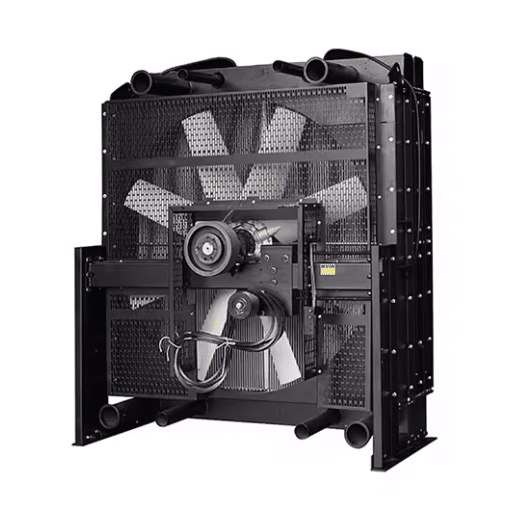
- Check the Presence of Blocked Coolant or Fan: If my generator includes components intended for cooling, which are most likely a radiator and fan, I must routinely maintain and monitor them for absent ventilation and coolant spills. One would be able to perform this by thoroughly cleaning the radiator fins and checking the coolant levels.
- Watch Engine Load: I must point out that when a generator is run at full load without breaks, it can indeed lead to overheating situations. All I need to do is keep in check the power requirements and make sure the generator is not being driven beyond its rated output. As for technical parameters, suppose my generator has a maximum rated load of, say, five thousand watts, then I have to guarantee that this value does not exceed that load.
By looking into these matters to some extent, I can reduce the chances of overheating the sounds of a breakdown, and all the troubles related to the failure of my generator.
What Steps to Take If the Generator is Not Producing Electricity?
When my generator fails to produce electricity, I need to take a few steps which I will consider the most reliable sources.
- Check the Circuit Breaker and Fuses: I can begin the troubleshooting process by first determining if any circuit breaker switches have been tripped or if any fuses are blown. Power generation may be restored if the breakers are reset or the fuses are replaced.
- Inspect the Fuel System: Any deficiency or poor quality of fuel can result in electricity generation problems. I need to make sure that the fuel is new and that the fuel lines are unobstructed and appropriately connected.
- Identify the Wiring of the Generator: An electrical outlet may be disconnected or the wires may be improperly connected, resulting in power failure. An effective inspection for any loose or broken wires followed by fixing them would be required.
- Check the AVR (Automatic Voltage Regulator): If my generator indeed possesses an AVR, I should perform a check to confirm that it is operational since it is vital for voltage regulation.
- Check the Alternator: I can use a multimeter to determine whether or not the alternator is functioning as it should. Typical values to be concerned with are making sure the alternator is outputting the voltage it should. These values suggest that the alternator is malfunctioning.
Using these points and the technical specifications found in the generator manual, I can solve this problem in an orderly manner and restore power generation effectively.
How Can You Maintain Your Portable Generator?
What Are the Best Practices for Generator Maintenance?
According to the best available evidence, the proper handling of a portable generator entails regular and uncompromising care in three primary areas:
- Routine Checking and Cleaning: I need to carry out periodic exams on the generator so as to rule out any external damage. Failing to monitor leaks of diesel and oil, and suffering a dirty generator casing are cases of failure. Air filters must also be removed and cleaned on a need basis.
- Refuelling and Replenishing Oil: The importance of changing oil over a long-term basis cannot be overemphasized. The best recommendation is to change the oil within 50-60-hour operational intervals or as directed in the manual. Whenever possible, adding a fuel stabilizer is highly recommended.
- Battery Care: In the case of generators with a battery starter, I’ve to make sure that the battery is fully charged, the connectors are not corroded, etc. Checking the battery from time to time eliminates any chances of malfunctioning at the time required.
- Updating and Storing Safely: It is prudent to update the generator’s firmware and if it is not possible to update it then appropriately store the generator in dry and well-aerated conditions as this will enhance its useful life. I have to ensure that I store it with the fuel valve closed and the carburetor devoid of fuel to avoid problems relating to fuel.
- Exercising the Generator: I use my generator for 30 minutes every last Sunday of the month. I ensure that all parts of the generators are lubricated and operational. Other than that, this activity helps prevent sticky gasoline from settling in the system and blocking the system.
To my knowledge, the aforementioned best practices, supplemented by observance of the particular technical instructions provided in the generator’s manual, help me to optimize performance and work longer time with my portable generator.
How Often Should You Inspect the Air Filter and Change the Oil?
Among the preventive maintenance practices of a portable generator, the inspecting of the air filter and changing the oil are crucial tasks. Citing the top resources available;
- Air Filter Inspection: Aged fifty hours is the example run time after which the air filter should be checked or run time usage of the generator in a dusty area. Air filters need to be cleaned frequently since they are vital for proper air circulation and combustion.
- Oil Change: About 50-60 hours of operation, or once in the respective season, will be sufficient to keep the engine running. Engine wear is limited with the use of oil changes on a timely basis.
There may be slight differences in the numbers mentioned in such intervals owing to the model and the conditions of its use, however, the user manual for the generator should be used for the correct recommendation for those who have no much idea or are new. To ensure the generator works efficiently, adjust maintenance according to the surroundings and instructions from the manufacturer.
How to Troubleshoot and Replace the Ignition Coil?
Sorting the ignition coil of my portable generator will require first diagnosing the coil’s status which may include: difficulty in starting the engine, misfiring, or the engine stalling when in operation. As per the top information on Google, I move forward by doing the following steps.
Please make sure that the generator is turned off and it is completely cooled. Disconnect the spark plug to prevent some accidental start-up.
Examine the ignition coil visually for any kind of physical damage, cracks, or corrosion, and check if all the connections are tight to the coil.
Using a multimeter, I perform the test for the ignition coil. Measure parameters such as the continuity of the coil and resistance. For most models, the primary winding resistance should range from 0.4 to 2 ohms whereas the secondary winding resistance should range from, 6000 ohms–12000 ohms. Always refer to the manual of the generator for this information.
If the coil is defective, I take out the mounting screws and disconnect the coil from the engine uninstalling the defective coil. Ensure to install a new compatible ignition coil and reconnect the wires. Bolts along with screws will be used to secure the coil.
As long as I pay careful attention to these troubleshooting steps and consult the generator manual for technical details, I can deal with ignition coil problems and keep the generator functioning properly.
What Are the Frequently Asked Questions About Generator Care?

How to Extend the Lifespan of a Generator?
To improve the durability of the generator, I am keen on its regular maintenance and correct usage. As Maya Angelou once said, “Nothing will work unless you do,” thus here are a few practices that I apply:
- Change Oil Regularly: To avoid adverse implications on the engine’s performance, I make it a point to change the motor oil every 50-100 hours as given in the manufacturer’s advice.
- Air Filter Maintenance: Due to its vital function in the airflow, I have come to clean the air filter at least every 25 hours or often in dusty places.
- Fuel System Care: I maintain the fuel system by utilizing new fuels and ensuring that the reservoir is free of debris to prevent clogs. If the generator is turned off for an extensive period, I utilize a fuel stabilizer to lessen the chances of fuel deterioration.
- Battery Check: From experience, batteries enhance reliability in electric starting systems; hence, I always check the battery regularly to make sure it’s well-charged.
- Do Not Overload: When using a generator, you do not need to drive it hard. You should limit the wattage above the recommendation to avoid overheating, which can cause further exploitation of all the components.
- Store Properly: A generator should not be left in the open; instead, it must be maintained and stored in a clean and dry area.
- Run on Load Occasionally: Running the generator with a load for a few hours every couple of months ensures that all the components remain operational.
- Inspect Cords and Connections: Inspecting cords and connections for any wear and damages from time to time reduces the chance of hazards and helps in proper functioning.
Observance of these maintenance practices plus regular reference to the user’s manual provided by the manufacturer, I increase the lifespan and efficiency of my generator.
How Can a Multimeter Help in Generator Troubleshooting?
Within the scope of generator failures, a multimeter works with helpful measures in support of electrical construction parameters. Drawing from my study of various websites, this is why a multimeter is considered useful in generator analysis:
- Voltage Testing: There are generators, normally 120V or 240V powered generators, which are most likely mounted in most households, so a familiar note indicates that a multimeter can check that the output from the generator corresponds to its specified output voltage range of the generator. This is useful in assessing defects in voltage output which may be caused by the alternator or voltage regulator.
- Current Measurement: In this case, it would be I simply measure the current (amperage) readings out of the circuits containing the generator and determine that the generator is not abused as the output should fit within the limits rated by the manufacturer.
- Resistance Checking: The multimeter can even evaluate the amount of resistance which is in the generator coils and even the rest of the electrical components. Involvement of specific basses in the manuals often but not always in ohms is how a good resistance range will be. Differences will suggest reasons like a short circuit or even an open coil.
- Continuity Tests: This helps in identifying if there is a discontinuity in the circuit which may be due to a disconnection in the wiring. I use this feature in order to check whether all the wires are complete and if there are no breaks in the circuits that may hinder normal performance.
Employing these functions, I can perform a step-by-step diagnosis of the generator and rectify any problems that are likely to hinder it from achieving efficiency and reliability.
Frequently Asked Questions (FAQs)
Q: What should I do if my generator won’t start during a power outage?
A: If your generator won’t start during a power outage, first check that there is enough fuel in the fuel tank. Ensure that the valves are open and that the battery is charged. If these are in order, you may want to check the oil levels and ensure the oil isn’t old or low, as this can cause permanent damage to the engine. If the problem persists, consult a quick guide or contact us for generator repair.
Q: What are some common issues that can arise with my generator?
A: Some common issues that can arise with your generator include it not starting, overheating, or not supplying adequate power. Factors that can cause these issues include old fuel, clogged filters, or a malfunctioning transfer switch. Regular maintenance can help prevent these common issues.
Q: How can I help protect my generator from potential problems?
A: To help protect your generator from potential problems, perform regular maintenance such as checking the oil levels, replacing old fuel, and inspecting the filter between the fuel lines. Additionally, ensure you’re using the correct type of oil for your type of generator and follow the manufacturer’s guidelines.
Q: How do I check if my generator is working properly?
A: To check if your generator is working properly, use a multimeter to check the output voltage. Make sure the generator operates smoothly and doesn’t produce unusual sounds. Regularly run your generator and monitor its performance to ensure it operates as expected.
Q: What type of oil should I use for my generator?
A: The type of oil you should use for your generator depends on the manufacturer’s specifications. Generally, you’ll want to use a high-quality oil that matches the recommended viscosity for your specific type of generator. Refer to your owner’s manual for the exact type of oil needed.
Q: What steps should I take if my generator is overheating?
A: If your generator is overheating, first turn it off and allow it to cool down. Check for enough fuel and ensure the air vents are not blocked. Inspect the oil level and ensure it is sufficient. If the issue persists, it may be necessary to have a professional evaluate the generator for further issues.
Q: Can I use my generator to power my home’s appliances during an outage?
A: Yes, you can use your generator to power your home’s appliances during an outage. However, you’ll want to ensure your generator has enough wattage to handle the load of the appliances you plan to use. Consider installing an automatic transfer switch (ATS) for a safer connection to your home’s electrical system.
Q: How often should I perform maintenance on my generator?
A: You should perform maintenance on your generator every 100-150 hours of operation or at least once a year, whichever comes first. This includes checking the oil levels, replacing the air filter, and inspecting the fuel system to ensure everything is in working order.